Managing dependencies, Python versions, and conflicting libraries in modern Python development can often be cumbersome and time-consuming.
Traditional tools like Venv, Virtualenv, and Pipenv have helped manage these issues, but there’s a better way to simplify and streamline your workflow using Dev Containers with Daytona.
This guide walks you through setting up a Python development environment using Daytona’s containerized workspaces and the Dev Container.
TL;DR
Required tools and knowledge for hands-on learning.
Overview of both Dev Containers and Daytona.
Setting up a Python project template.
Creating a Python project workspace in Daytona.
Prerequisites
To follow this guide, you’ll need to have the following:
Overview of Daytona
Daytona is an open-source development environment manager that uses configuration
files from a project’s repository to build and provision workspaces. It simplifies
the process of setting up consistent development environments across teams or for
individual developers.
Key Features of Daytona:
Containerized Environments: Keep your laptop clean by using separated and containerized dev environments.
Portability: Move your environments with you or host them on a remote server.
Consistency: Ensure all team members work in identical environments, eliminating “it works on my machine” issues.
Easy Setup: Create a fully configured development environment with a single command.
IDE Integration: Seamlessly works with popular IDEs like VS Code and JetBrains products.
Git Provider Integration: Easily connect with GitHub, GitLab, Bitbucket, and more for smooth workflow integration.
GPU Support: You can leverage GPU acceleration directly within your Daytona workspaces, which is ideal for machine learning and data science projects.
Overview of Dev Containers
Dev Containers, short for Development Containers, are a way to configure portable
and reproducible development environments using Docker containers. Dev containers
are isolated, lightweight environments that allow developers to work inside a
containerized version of a build environment.
Key Features of Dev Containers:
Pre-configured Environments: Comes with all necessary software and tools pre-installed, so you can start coding immediately.
Isolation: Each container has its own filesystem, networking, memory, and CPU, avoiding conflicts with other projects or local software.
Reproducibility: Ensures consistent builds and avoids the “it works on my machine!” problem by providing the same environment every time.
Quick Start: Skip lengthy setup and configuration; just open your project, and everything is ready.
Flexibility: Choose or create a base image tailored to your specific needs.
Setting Up Your Python Development Environment
Now, we’re going to create a dev container for the Python dev environment using a devcontainer.json configuration file also, writing essential project files like main.py and requirements-dev.txt.
By defining a devcontainer.json file in your project, you can specify the exact environment configuration, including the operating system, tools, and dependencies needed for development.
This ensures that every developer on your team can work in the same environment, regardless of their local machine setup.
Here is the step-by-step guide:
Step 1: Create a new directory. Name the directory anything you like, then move into it.
1mkdir python-dev-env && cd python-dev-env
Step 2: Create a .devcontainer directory. This is where your devcontainer.json file will live.
1mkdir .devcontainer && cd .devcontainer
Step 3: Create a
devcontainer.jsonfile. You are going to createdevcontainer.jsonfile with the following code. This is the configuration file for the Python dev environment specifying settings and dependencies.
1{2"name": "Python 3",3"image": "mcr.microsoft.com/devcontainers/python:3.11-bullseye",4"customizations": {5 "vscode": {6 "settings": {7 "python.defaultInterpreterPath": "/usr/local/bin/python",8 "python.testing.pytestEnabled": true,9 "python.testing.unittestEnabled": false,10 "files.exclude": {11 ".coverage": true,12 ".pytest_cache": true,13 "__pycache__": true14 }15 },16 "extensions": [17 "ms-python.python",18 "charliermarsh.ruff",19 "ms-python.black-formatter"20 ]21 }22},23"postStartCommand": "pip3 install --user -r requirements-dev.txt",24"remoteUser": "vscode"25}
Let’s break down the devcontainer.json file.
name: Specifies the name of the development environment.
image: Points to the Docker image used for the container, mcr.microsoft.com/devcontainers/python:3.11-bullseye, a Python 3.11 environment based on Debian Bullseye.
customizations: Allows customization of the development environment, specifically for Visual Studio Code.
vscode: AContains VS Code-specific configurations.
settings: Defines default VS Code settings for the container.
python.defaultInterpreterPath: Specifies the Python interpreter path inside the container (/usr/local/bin/python).
python.testing.pytestEnabled: Enables the use of pytest for testing.
python.testing.unittestEnabled: Disables unit test as the testing framework.
files .exclude: Hides specified files and folders (e.g., .coverage, .pytest_cache, pycache) from the VS Code file explorer.
extensions: Lists extensions to be installed automatically in the container.
ms-python .python: Python language support for VS Code.
charliermarsh.ruff: A Python linter.
ms-python.black-formatter: Formatter for Python code using Black.
postStartCommand: Installs Python packages from requirements-dev.txt (“pip3 install --user -r requirements-dev.txt”).
remoteUser: sets vscode as the non-root default user. By including a devcontainer.json file in your project repository, you can specify not just the Python version and dependencies, but also any required system packages, VS Code extensions, environment variables, and even custom scripts to run during setup.
Step 4: Create a
main.pyfile
Create a simple main.py file in the root of your project directory. This file will act as the
entry point for your application.
1def add_numbers(a, b):2return a + b
This code defines a simple function add_numbers to add two numbers.
Step 5: Create a
requirements-dev.txtfile
Add a requirements-dev.txt file to specify development dependencies. Include the following content:
1ruff2black3pytest4coverage5pytest-cov
Step 6: Create a test directory
Inside your project directory, create a tests folder to store your test cases.
1mkdir tests
Inside the tests folder, create a test file named test_main.py and add the following code:
1from main import add_numbers2def test_add_numbers():3 assert add_numbers(2, 2) == 4
This test imports the add_numbers function from main.py and verifies that it returns the correct sum when given 2 and 2 as inputs.
Step 7: Initialize, Commit and Create a GitHub repository. Now initialize git and commit all the changes you made to your directory.
1git init2git add.3git commit -m "inital commit"
After committing your code, you will push it to a remote repository of your choice.
1git remote add origin https://github.com/YOUR-GITHUB-USERNAME/YOUR-DIRECTORY-NAME.git2git branch -M main3git push -u origin main
Creating the Python dev environment in Daytona
Here, you will use Daytona to build the Python dev environment using GitHub as a Provider and
open a workspace in VS Code. You should ensure daytona is installed on your machine before proceeding.
Step 1: Start Daytona Server
Start the daytona server by running the command.
1daytona server
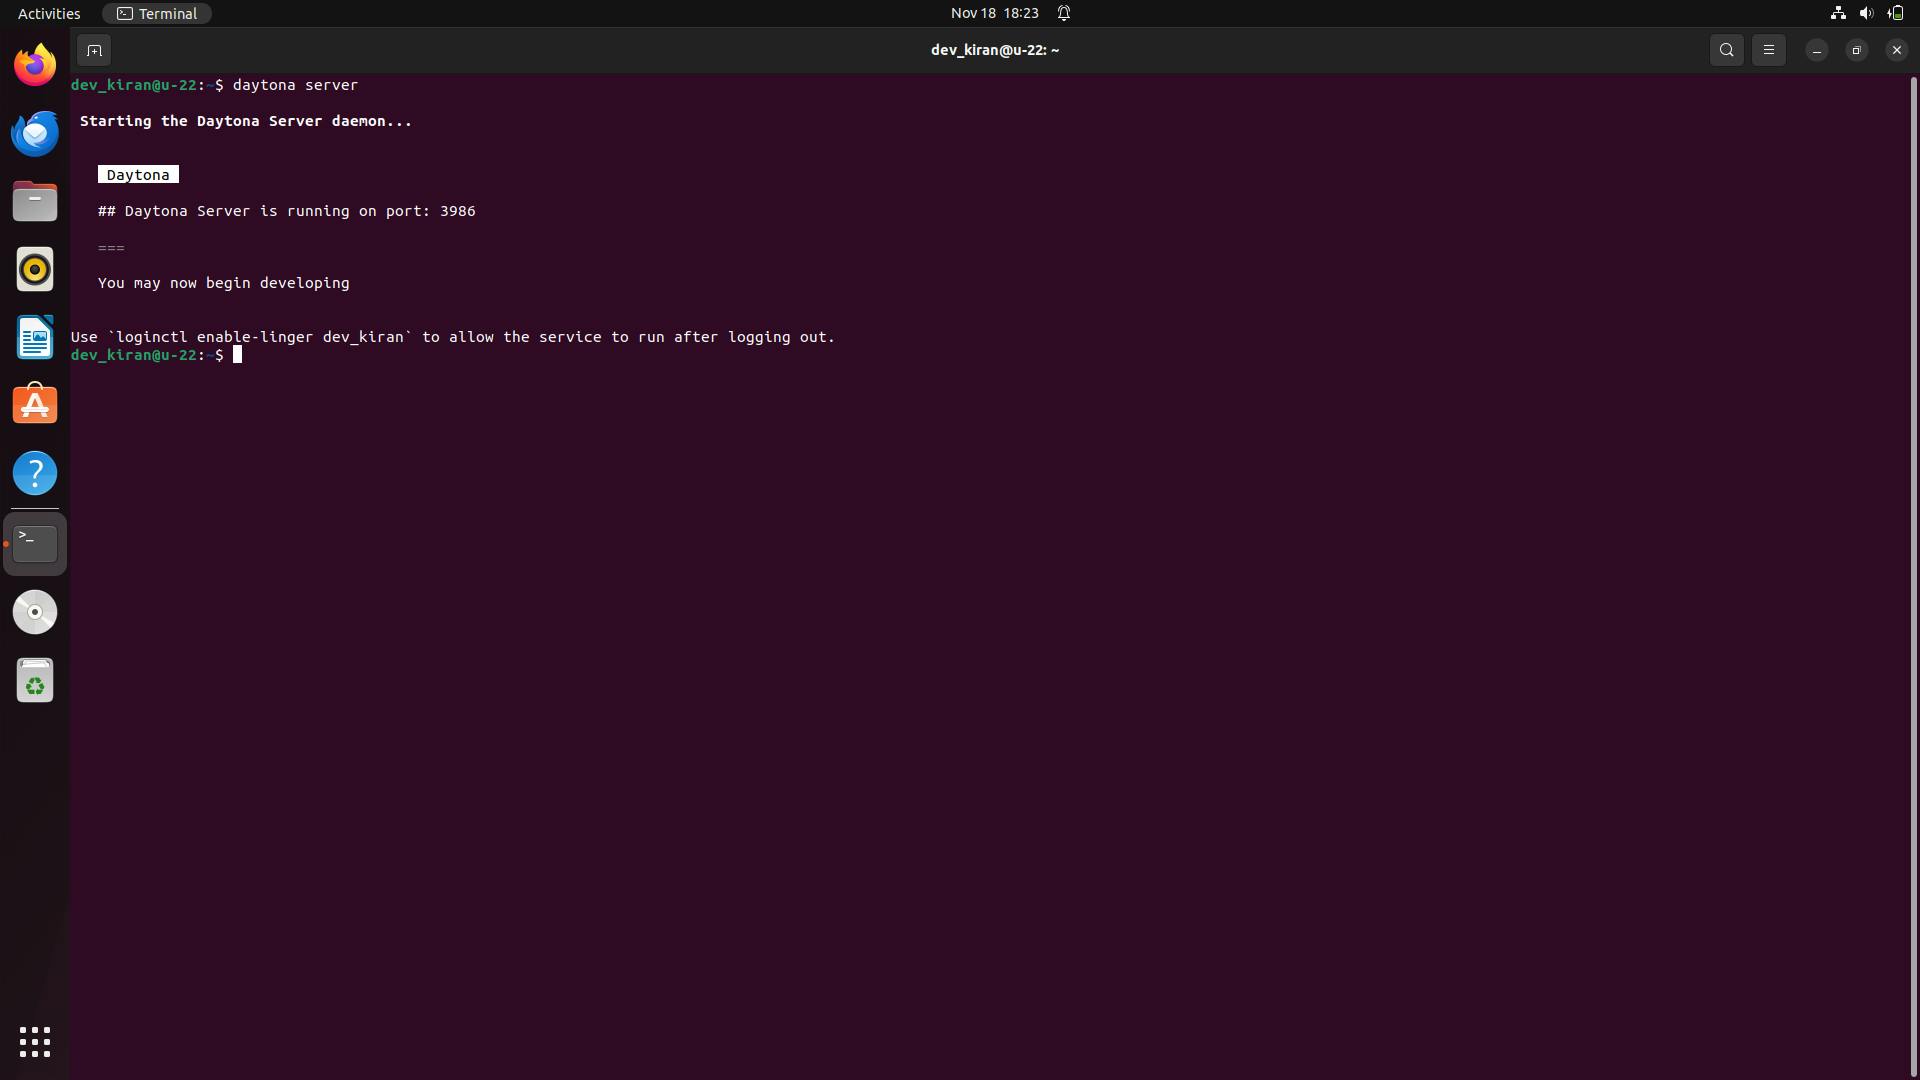
Your output should be similar to the screenshot below.
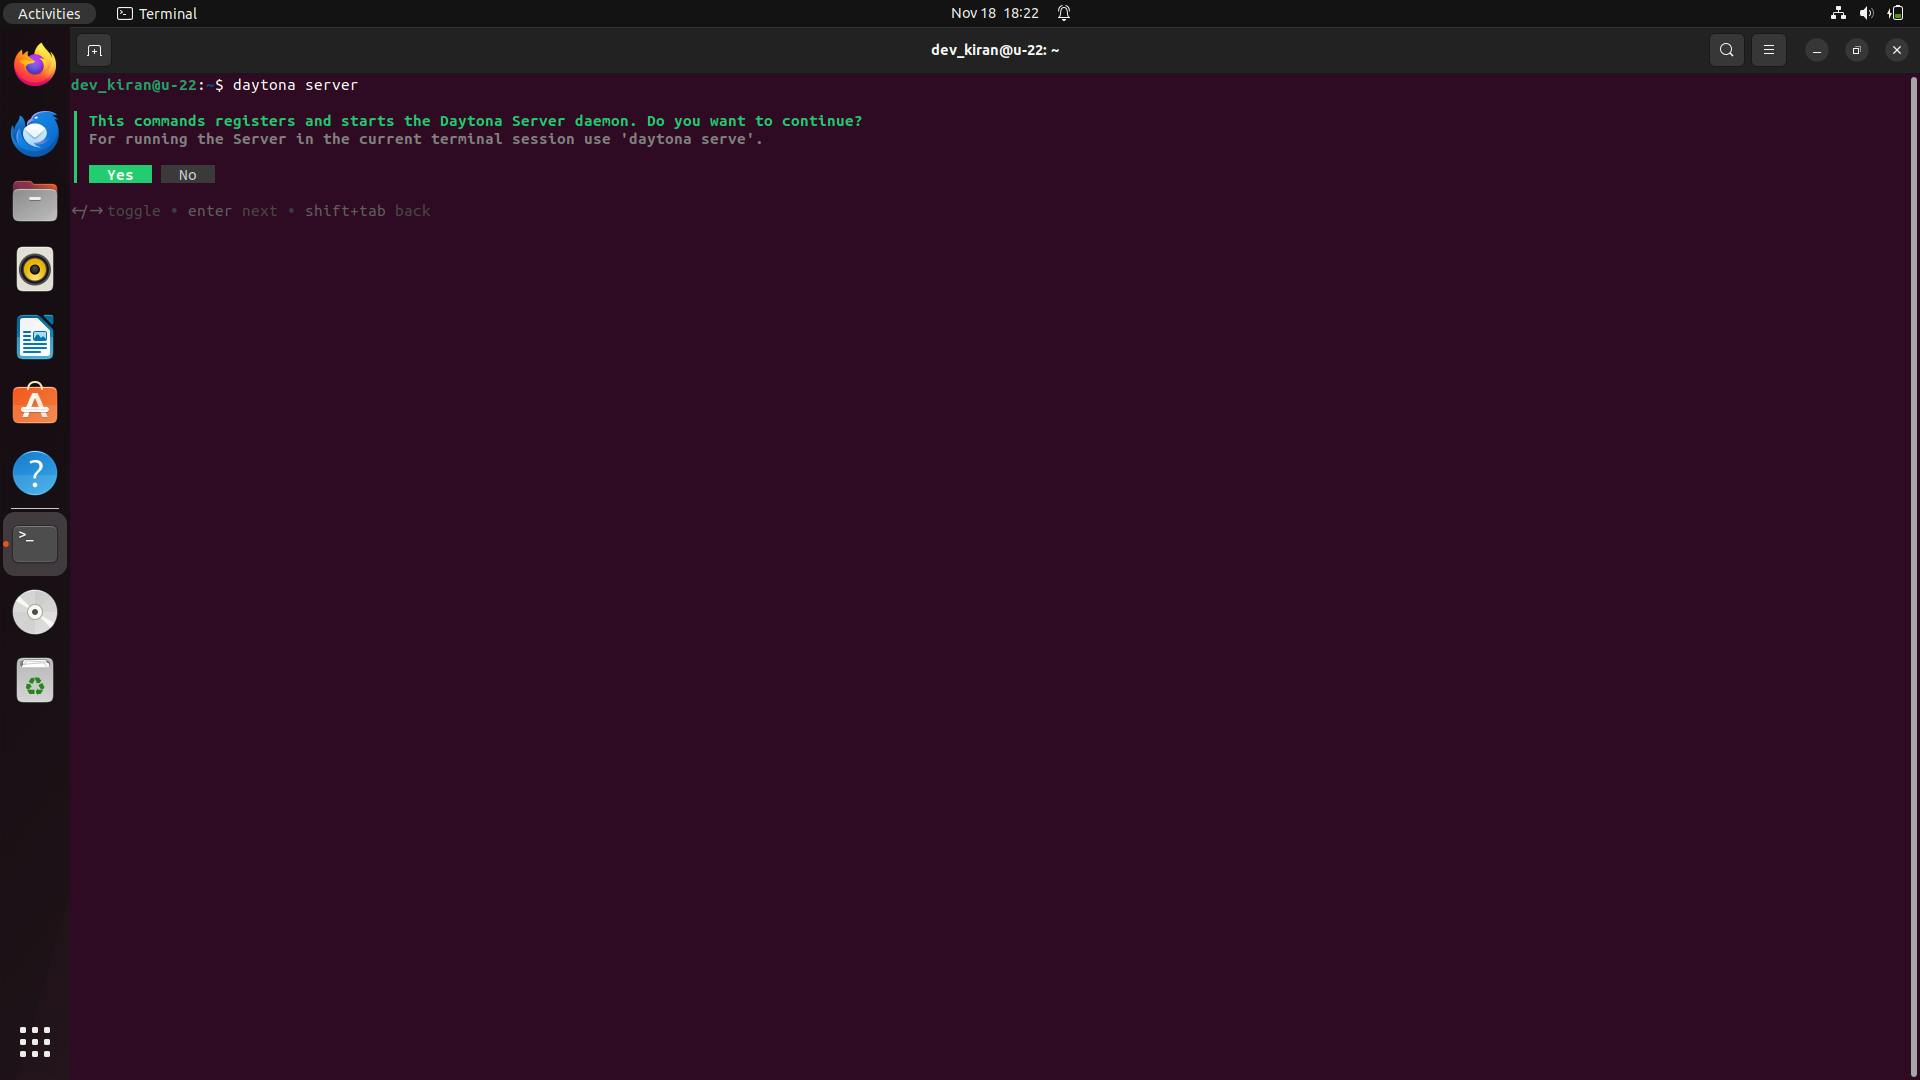
Choose “yes,” and you should see a similar output in the screenshot below.
Step 2: Add Git Provider
Daytona integrates with your preferred Git provider, streamlining your workflow
by allowing direct access to repositories and simplifying workspace creation
from existing projects.
Execute the command provided below to add your git provider. Daytona also has support for other Git providers like Bitbucket and GitLab. You can learn more
about Daytona Git Providers here
1daytona git-provider add
Your output should be similar to the image below.
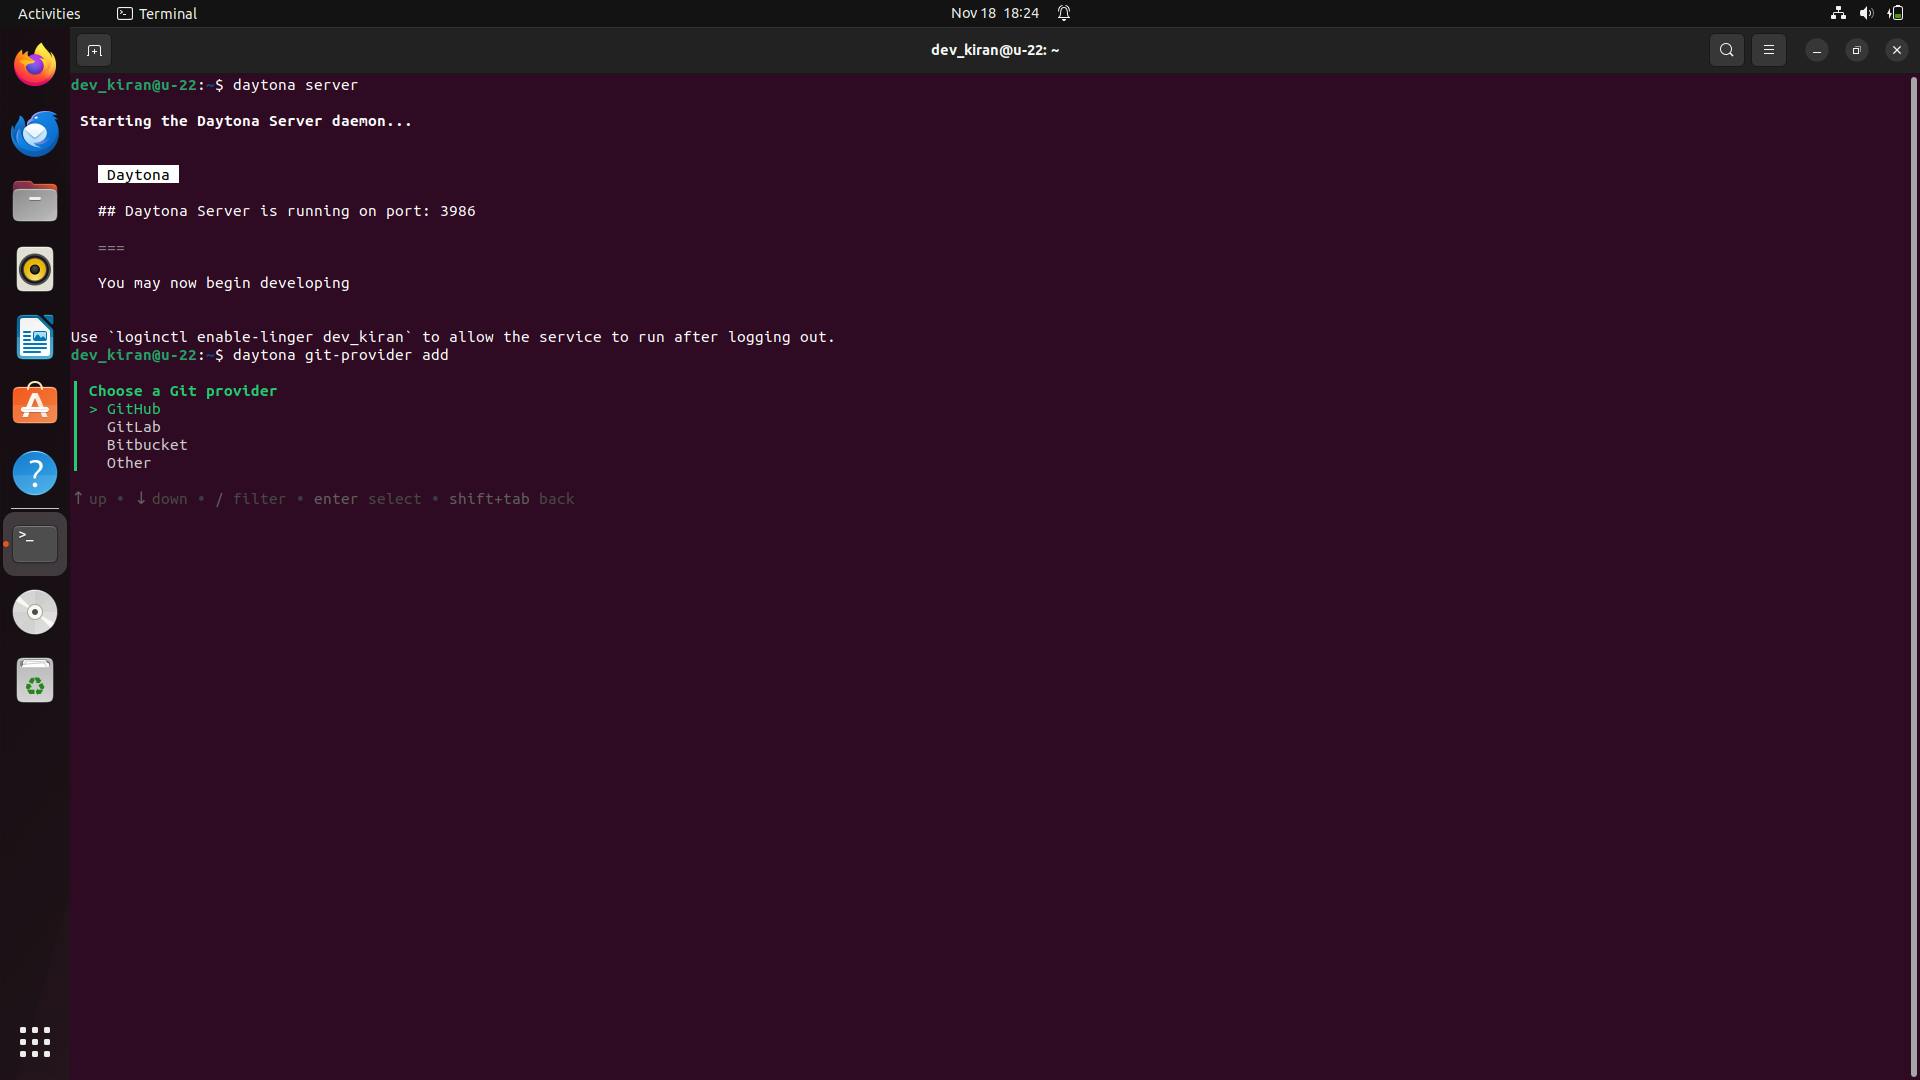
Select GitHub and provide your personal access token.

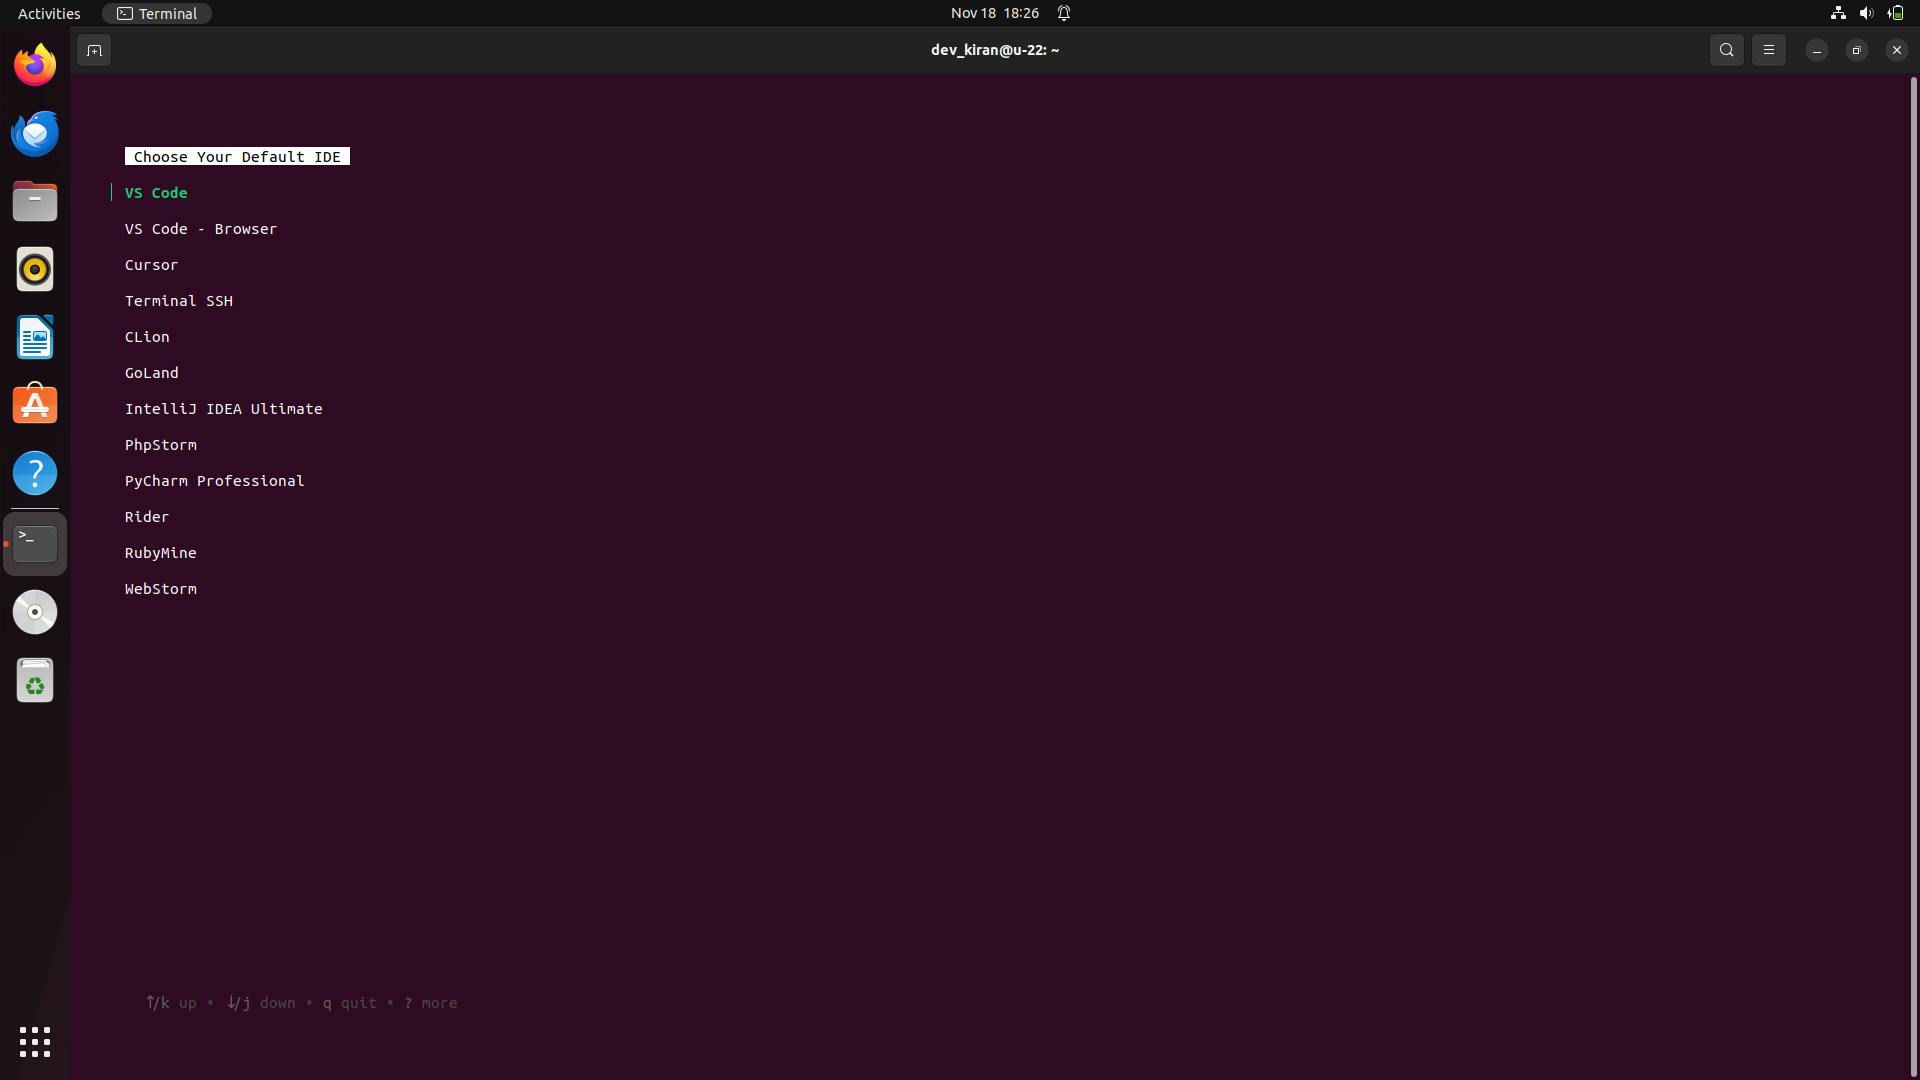
Step 3: Choose your preferred IDE
Run this command in the terminal to choose your IDE.
1daytona ide
Step 4: Create a Daytona Workspace
Now create a dev environment of the repository you created in GitHub(by forking) and
follow the prompts after you run it.
1daytona create
Choose GitHub as a provider and select the python-dev-env repository.
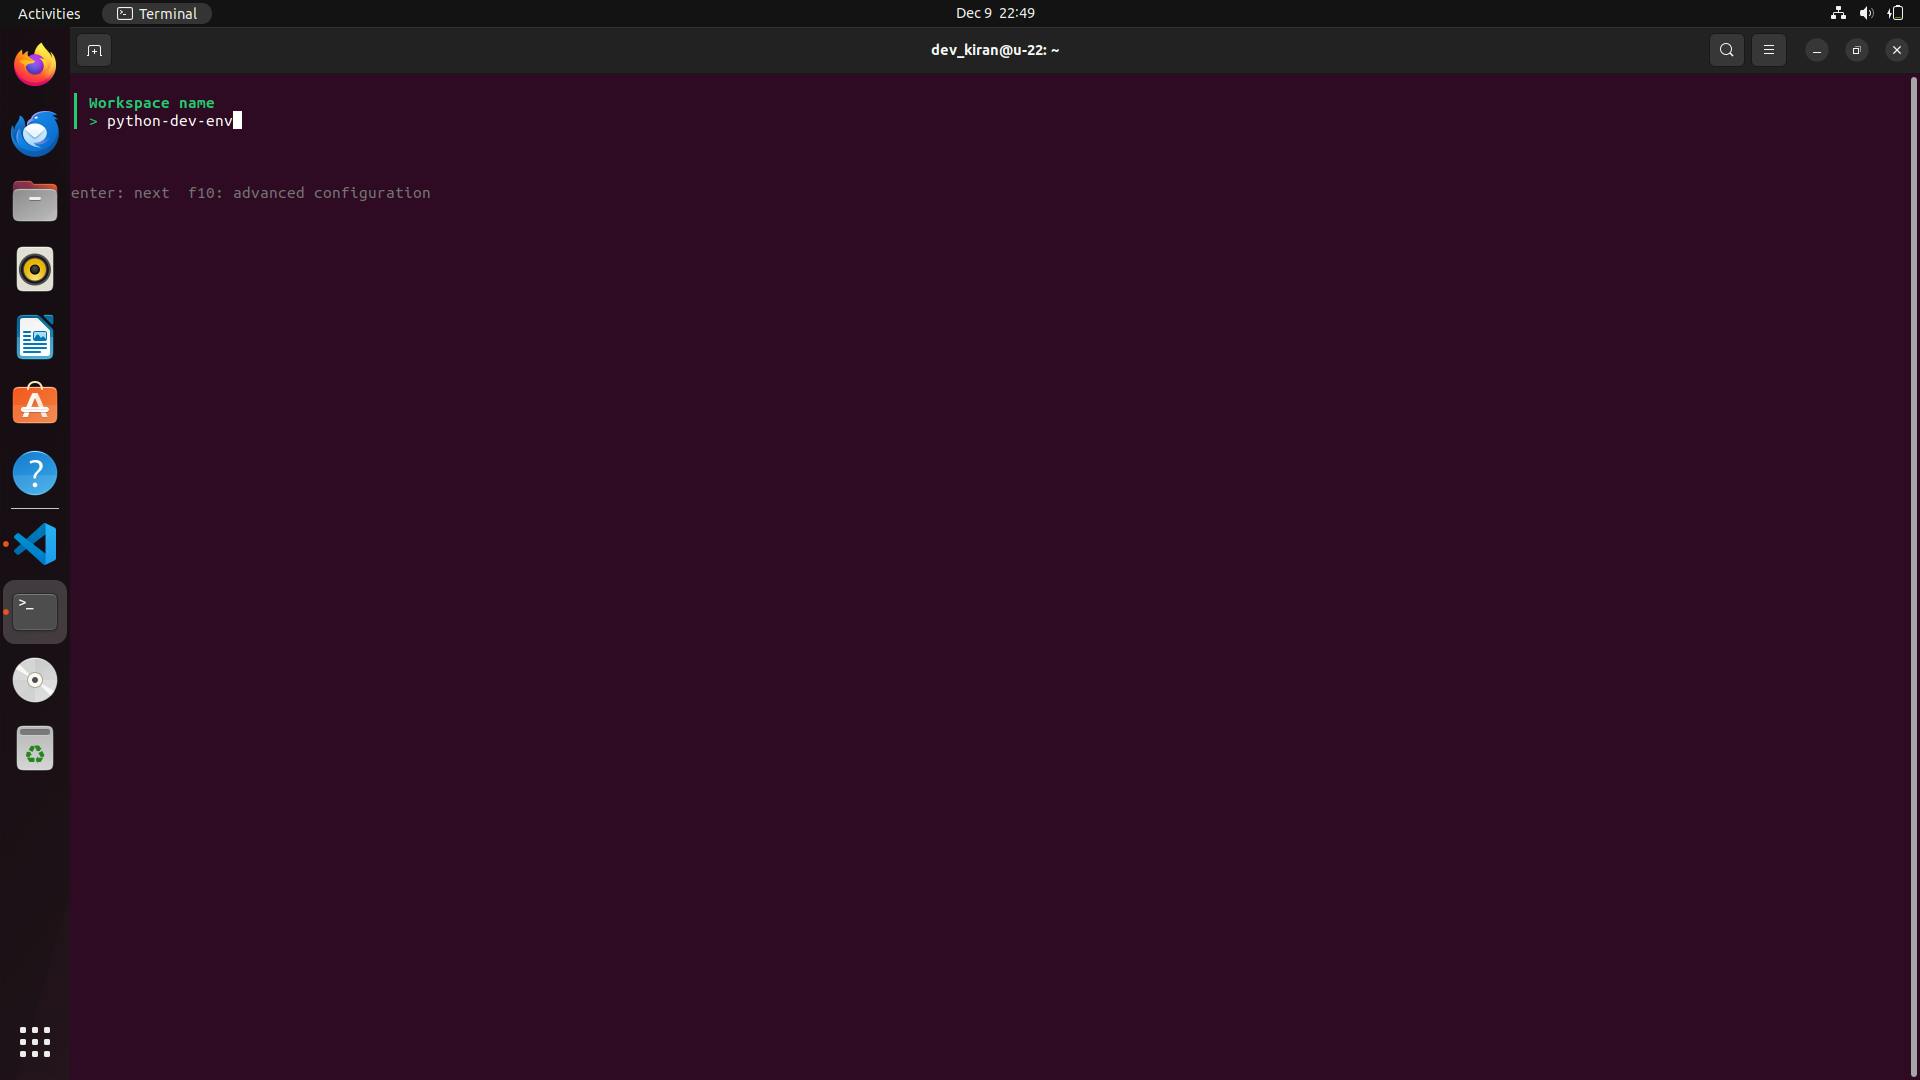
Step 4.1: Provide workspace name
The name of the workspace is usually the repository name if you didn’t modify it when
prompted in the creation of the workspace.
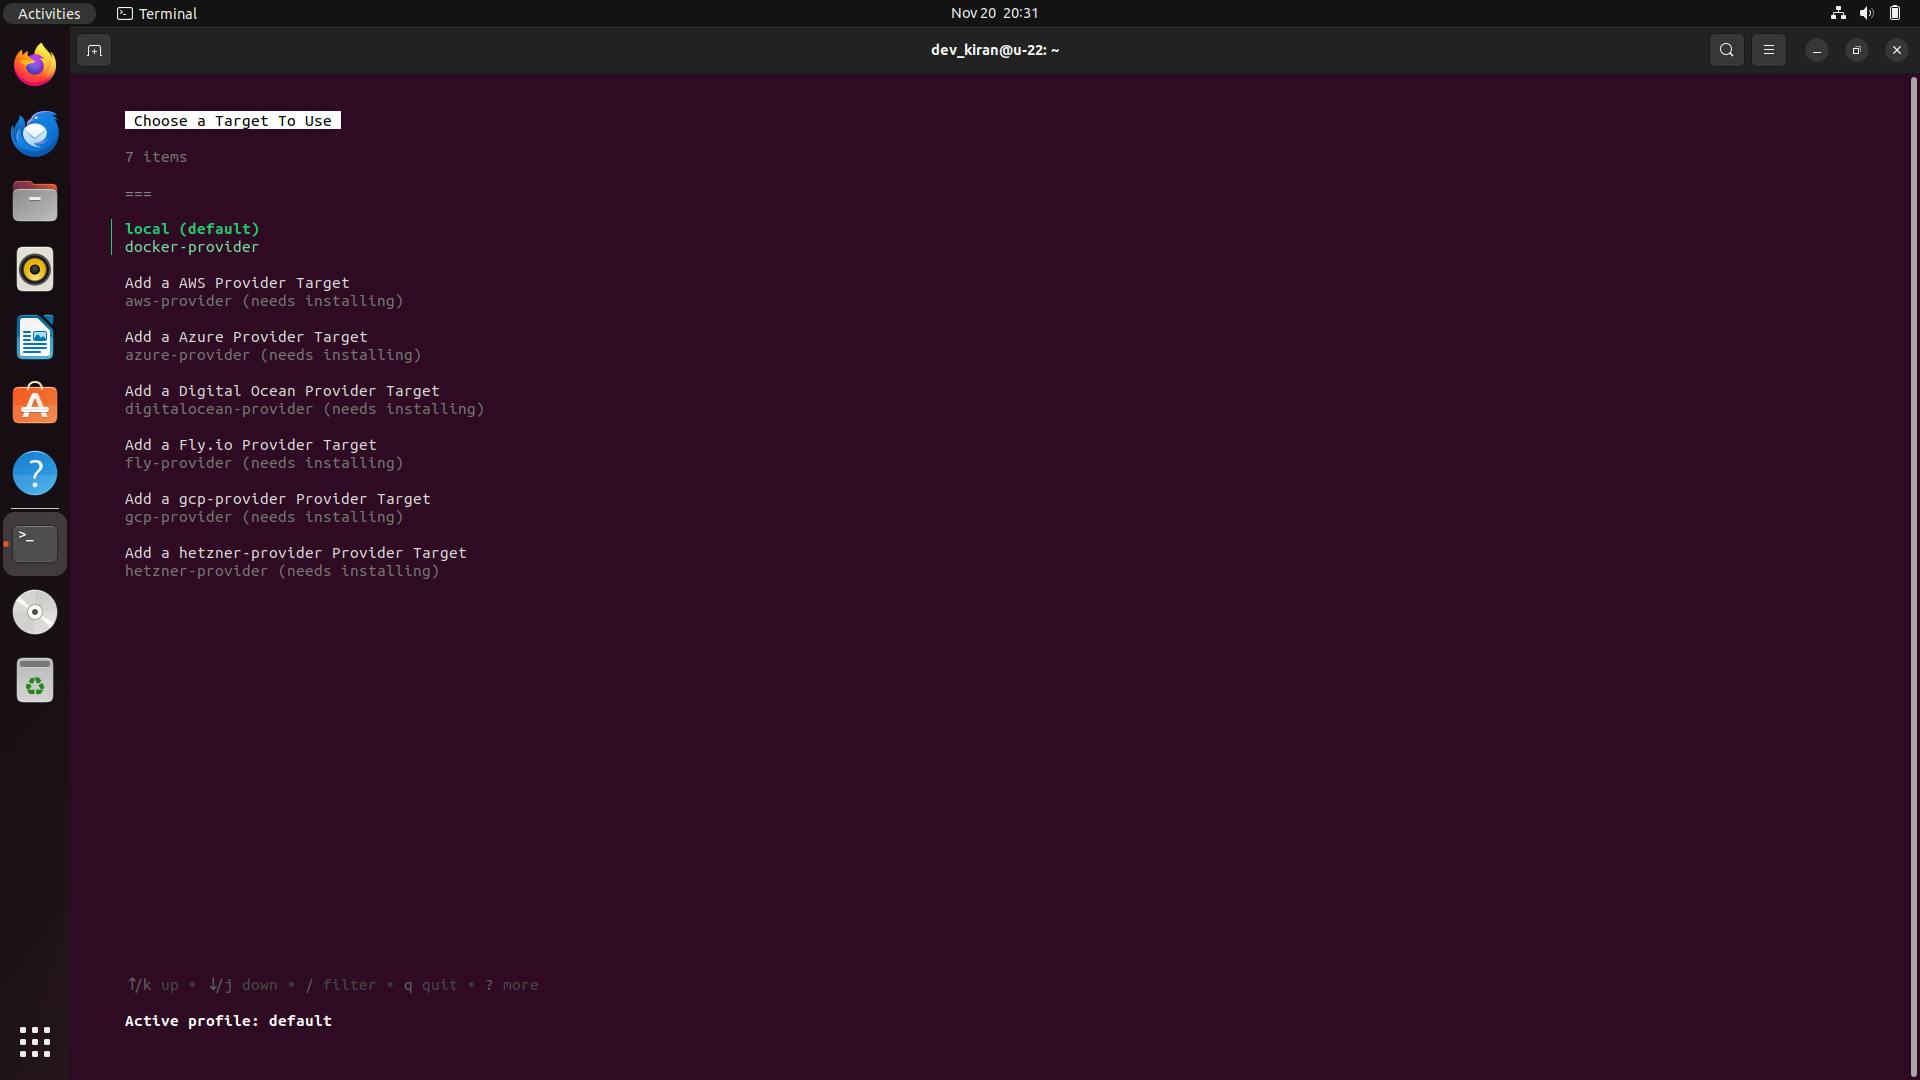
Step 4.2: Choose the target
Now, it will ask you to choose the target, select local, and enter.
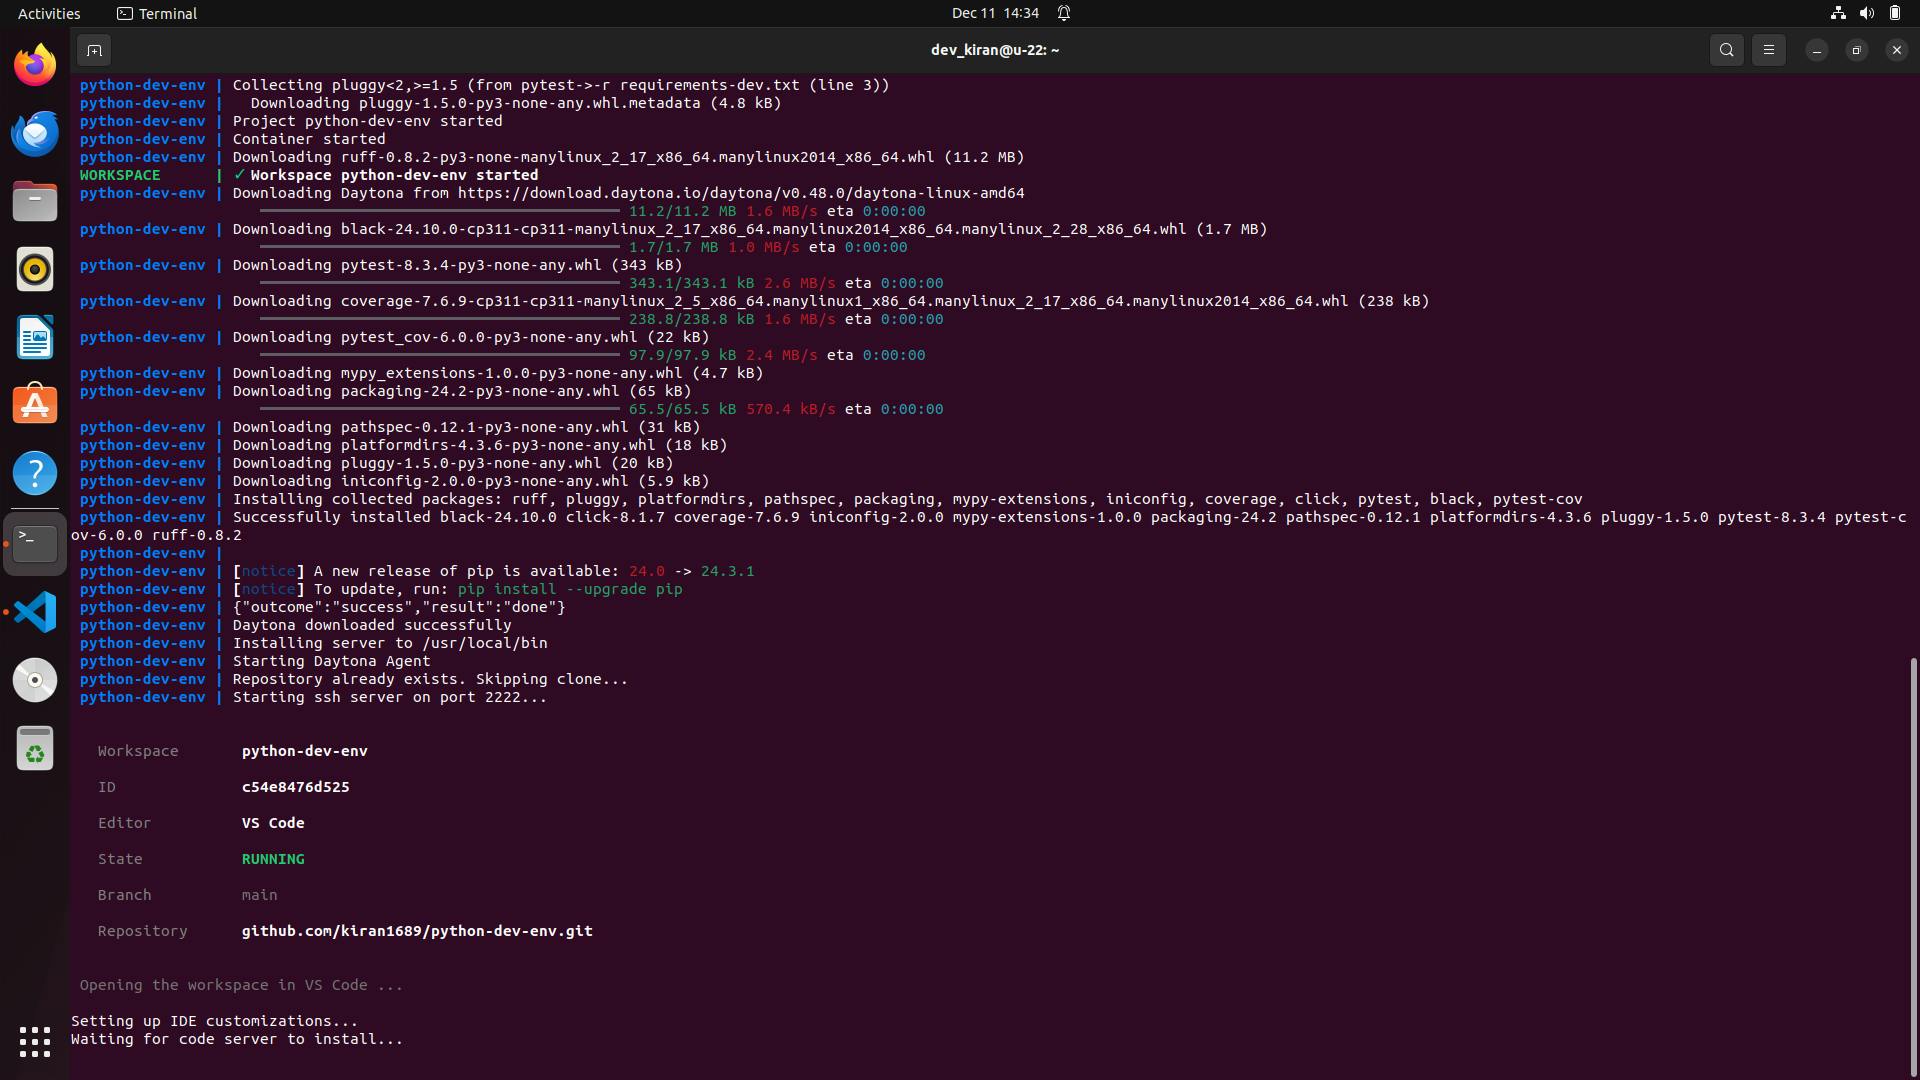
Daytona will now start creating a workspace by pulling your project and installing all
required dependencies, once done, it will open your project in your default IDE.
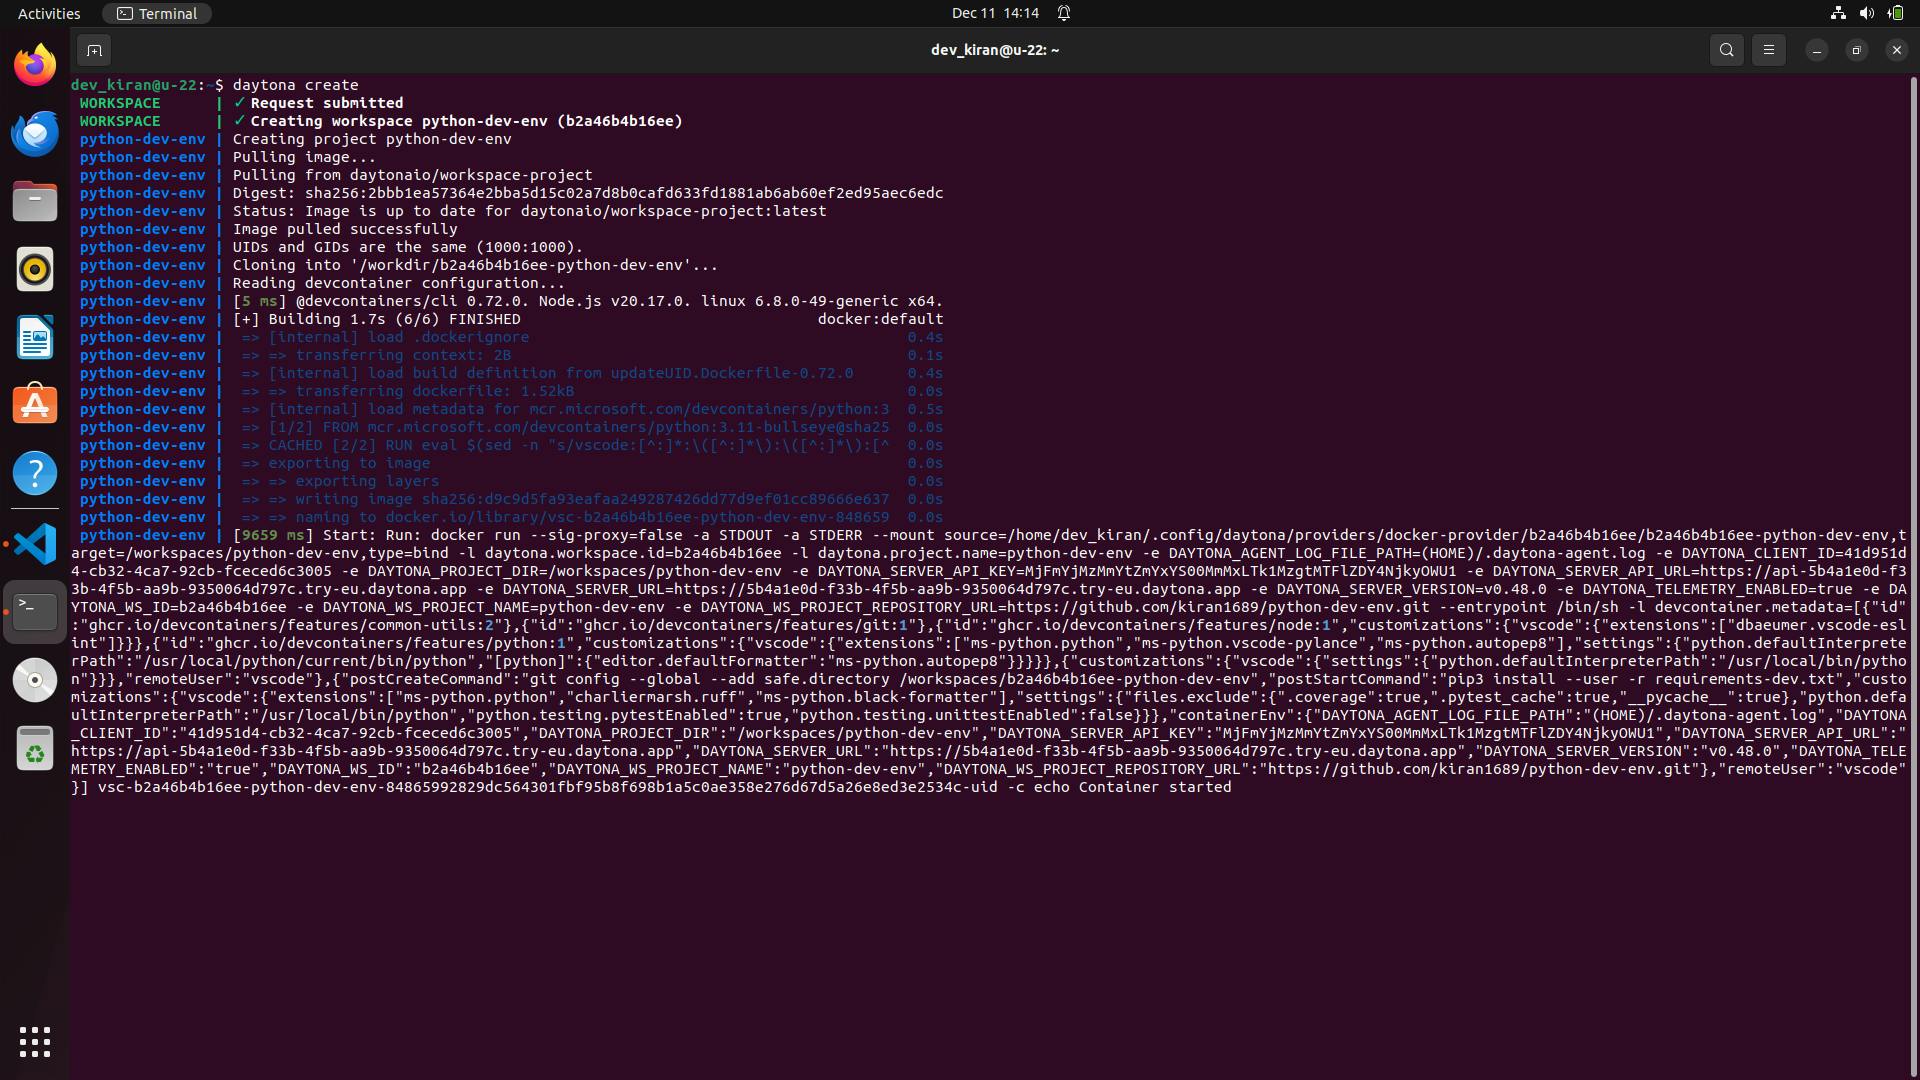
Now, your Python dev environment is ready to use.
Confirmation
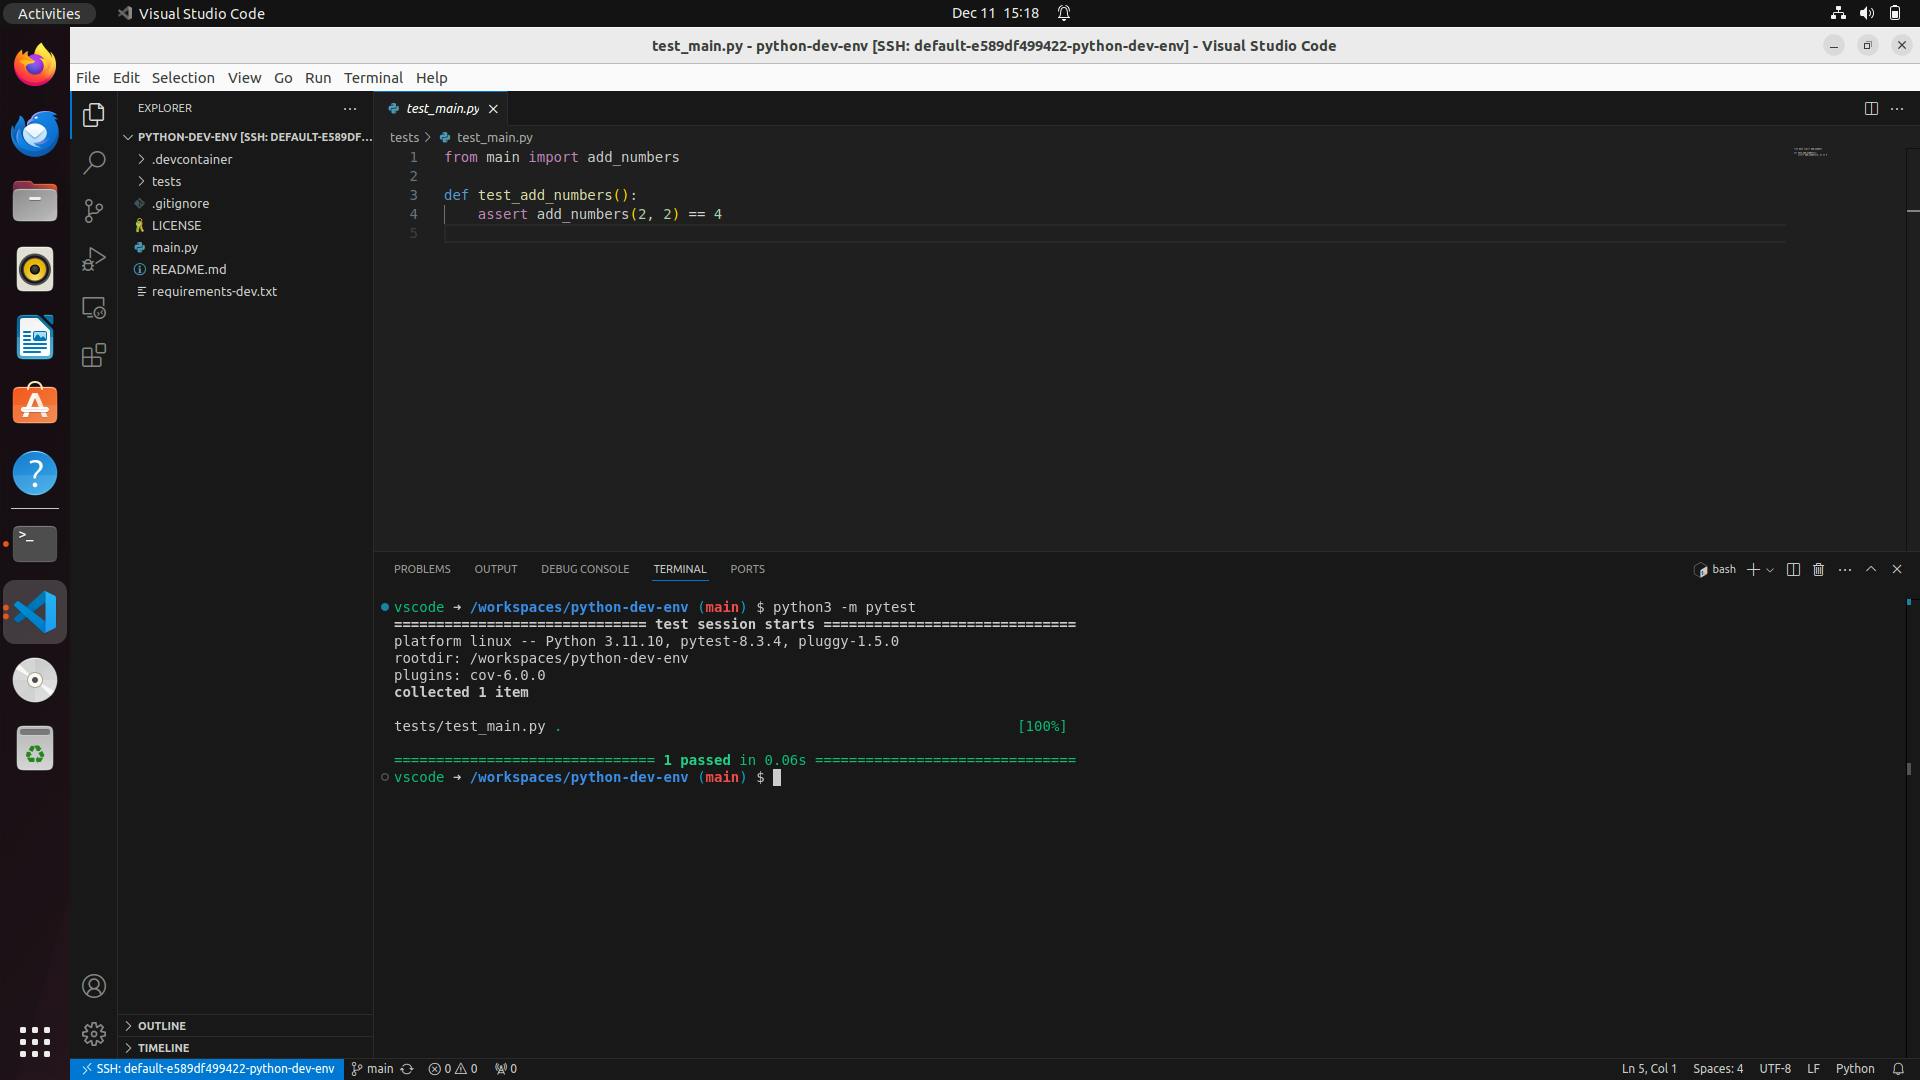
In your VS Code, run the test cases using the command below, and you will see all the test cases passed. This means the Python dev environment has been successfully set up for your project.
1python3 -m pytest
Conclusion
By following this guide, you’ve set up a fully containerized Python development environment using
Daytona and Dev Containers. This setup ensures that your projects are reproducible, isolated, and
consistent across machines, enabling smooth collaboration and effortless debugging.