Running large language models (LLMs) inside a containerized environment provides flexibility, portability, and GPU acceleration, making managing dependencies and optimizing performance easier.
This guide will walk you through how to set up and run the Mamba-Codestral-7B-v0.1 model, hosted on Hugging Face, within a container with a dev container.
TL;DR
Containerizing LLMs enhances flexibility and GPU performance.
Guide covers setting up Mamba-Codestral-7B-v0.1 in a dev container.
Involves environment setup, model download, and scripts for text/code tasks.
Daytona ensures efficient GitHub integration and workspace management.
Prerequisites
To follow this guide, you’ll need to have the following:
Understanding of Python, LLMs, Development Environment and Dev Containers
A Linux machine with the minimum specifications: 32GB RAM, 8 CPUs, and a GPU with at least 16GB VRAM for optimal performance.
An IDE (like VS Code)
Docker (download from here)
Daytona's latest version (install from here)
Overview of Mamba Codestral
Mamba-Codestral-7B-v0.1 is a powerful 7-billion parameter large language model (LLM)
designed to handle a wide range of natural language processing and code-related tasks.
Developed with a focus on efficiency and versatility, the model strikes a balance between
high performance and accessibility, making it an excellent choice for developers looking
to integrate LLM capabilities into their projects.
Here are the key features of Mamba-Codestral-7B:
Versatile Language Model: Excels in natural language understanding and code-related tasks like generation and debugging.
GPU Supported: Designed to leverage modern GPUs for faster inference, enabling efficient local or cloud-based deployment.
Lightweight and Efficient: Optimized for fast performance on GPUs and resource-efficient setups.
Local Development Friendly: Runs offline, ensuring privacy and flexibility for developers.
Hugging Face Integration: Seamless setup and support from an active developer community.
Key Use Cases:
Code generation: Generate boilerplate code or snippets based on natural language prompts.
Code debugging: Identify and suggest fixes for errors in source code.
Documentation assistance: Create detailed comments and explanations for code.
Step 1: Preparations
To run the Mamba-Codestral-7B-v0.1 model inside a containerized development environment,
you need to prepare your tools and resources before setting up the devcontainer.
Step 1.1: Create a Hugging Face Token
You must create a Hugging Face token to access or download the model. Follow the steps below to do so.
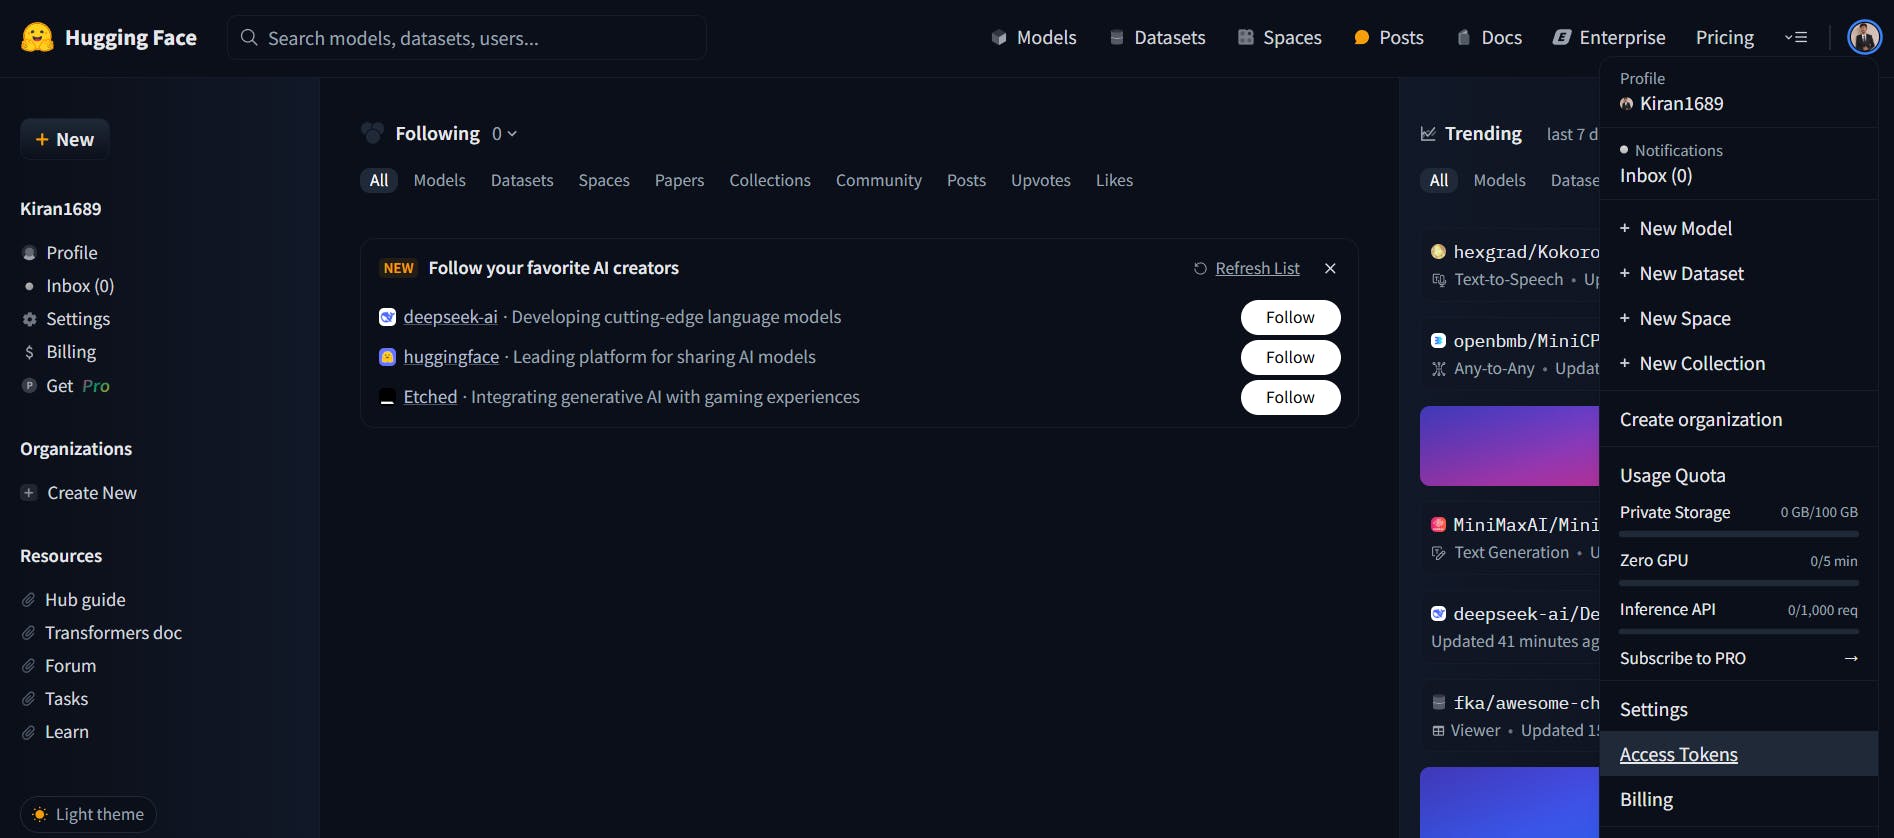
Step 1.1.1: Sign Up or Log In to Hugging Face
Go to Hugging Face’s website. If you don’t already have an account, sign up for free.
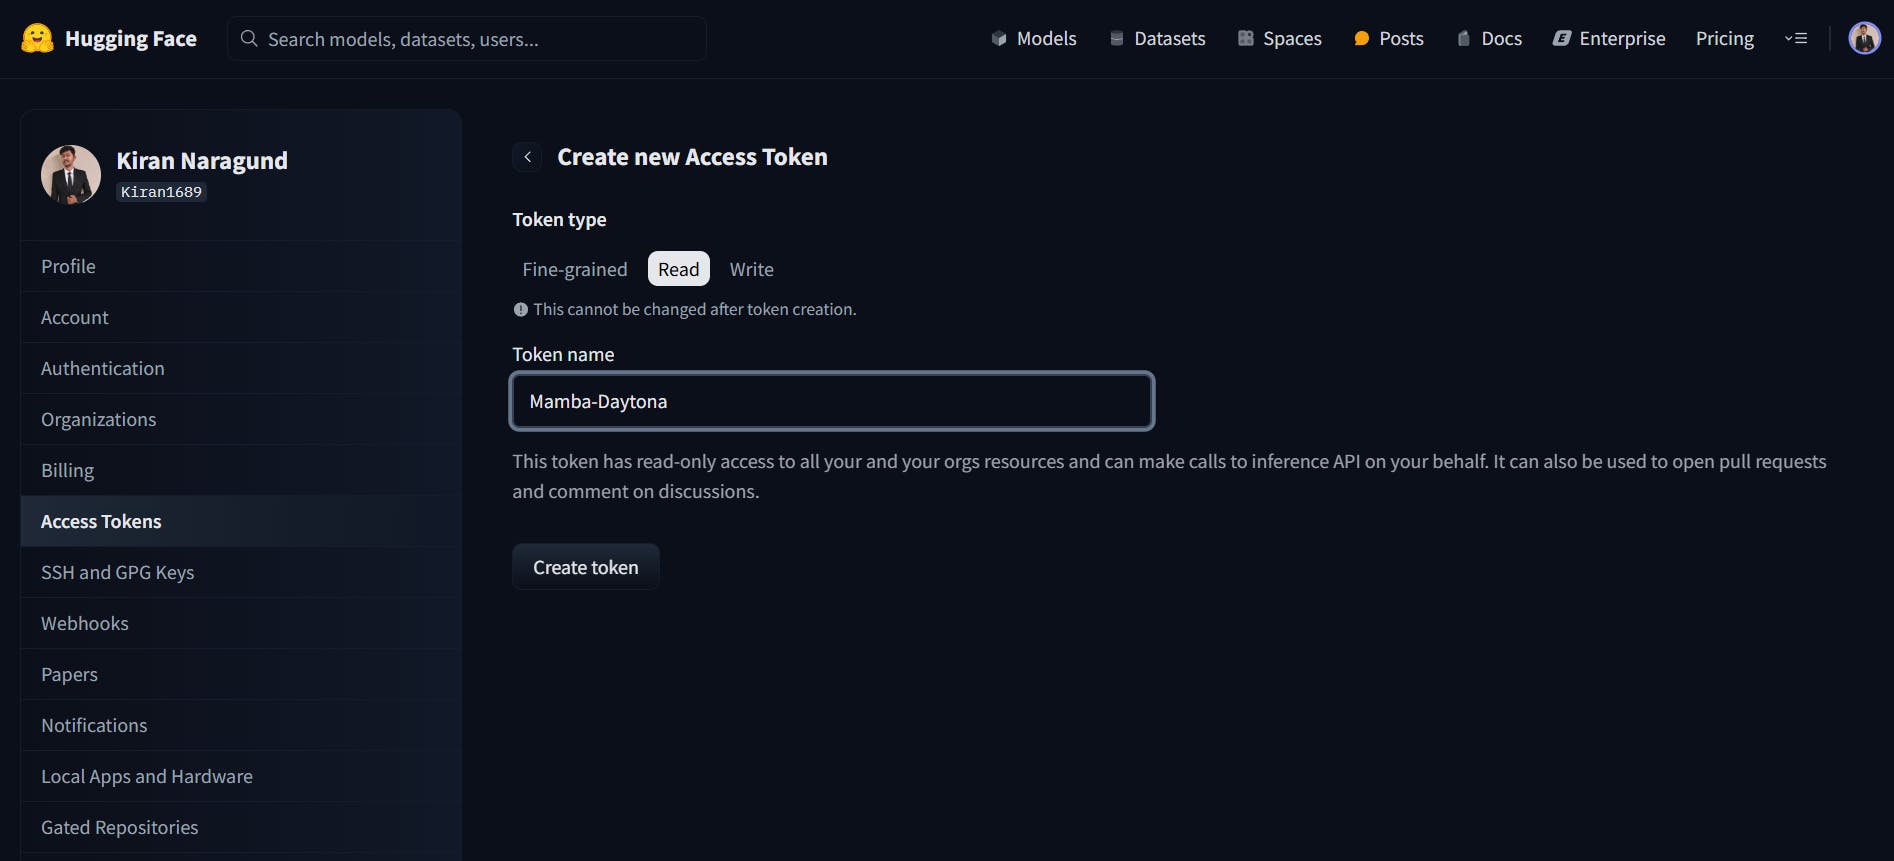
Step 1.1.2: Generate an Access Token
Navigate to your profile by clicking on your avatar in the top-right corner. Click on Access Tokens.
Provide a token name and Choose the Read role (this is sufficient to download models). Click Generate Token.
Step 1.1.3: Save the Token
Copy the token and save it securely. You’ll use it later when accessing the model.
Step 1.2: Install NVIDIA GPU Toolkit
You’ll need the NVIDIA Container Toolkit to allow Docker to utilize GPU acceleration. Follow the below steps to install the NVIDIA Container Toolkit.
Step 1.2.1: NVIDIA Drivers
Ensure the NVIDIA GPU drivers are installed on your host machine by running the below command:
1nvidia-smi
This should display information about your GPU. If you do not have drivers installed, run the below commands:
1sudo apt update2sudo apt install -y nvidia-driver-5503sudo reboot
You can replace 550 with the appropriate version compatible with your CUDA version.
Check out here to install it, depending on your operating system (Windows/Linux) and GPU.
Step 1.2.2: Configure the production repository to install NVIDIA Container Toolkit
Run the below commands on your Linux machine:
1curl -fsSL https://nvidia.github.io/libnvidia-container/gpgkey | sudo gpg --dearmor -o /usr/share/keyrings/nvidia-container-toolkit-keyring.gpg \2&& curl -s -L https://nvidia.github.io/libnvidia-container/stable/deb/nvidia-container-toolkit.list | \3 sed 's#deb https://#deb [signed-by=/usr/share/keyrings/nvidia-container-toolkit-keyring.gpg] https://#g' | \4 sudo tee /etc/apt/sources.list.d/nvidia-container-toolkit.list
Step 1.2.3: Update the packages list from the repository
1sudo apt-get update
Step 1.2.4: Install the NVIDIA Container Toolkit packages
Run the below commands on your Linux machine:
1sudo apt-get install -y nvidia-container-toolkit2sudo systemctl restart docker
Step 1.2.5: Verify installation
1docker run --rm --gpus all nvidia/cuda:12.6.0-base-ubuntu24.04 nvidia-smi
If your setup is correct, the nvidia-smi command will display information about your GPU,
confirming that the GPU is accessible inside Docker containers.
Step 2: Setting Up the Dev container and project repository
Now, we’re going to create a dev container using a devcontainer.json configuration file, also
writing several Python scripts and required files.
Step 2.1: Create a new directory
Create a directory with any name you choose and move into the directory.
1mkdir Mamba-Codestral-DevContainer && cd Mamba-Codestral-DevContainer
Step 2.2: Create a .devcontainer directory
This is where your devcontainer.json file will live.
1mkdir .devcontainer && cd .devcontainer
Step 2.3: Create a devcontainer.json file:
You are going to create a devcontainer.json file with the following code. This is the configuration file for the Python environment specifying settings and dependencies.
1 {2 "name": "Mamba-Codestral Environment",3 "image": "pytorch/pytorch:2.5.1-cuda12.4-cudnn9-devel",4 "runArgs": [5 "--gpus",6 "all"7 ],8 "hostRequirements": {9 "gpu": "true"10 },11 "features": {12 "ghcr.io/devcontainers/features/git:1": {}13 },14 "customizations": {15 "vscode": {16 "extensions": [17 "ms-python.python",18 "ms-python.vscode-pylance",19 "ms-vscode-remote.remote-containers",20 "nvidia.nsight-vscode-edition"21 ]22 }23 },24 "postCreateCommand": "pip install -r requirements.txt"25 }
Let’s break down the devcontainer.json file.
name: Specifies the name of the development environment.
image: Specifies the base Docker image with
PyTorchandCUDApre-installed.runArgs: Enables GPU access for the container with Docker arguments.
hostRequirements: Ensures the host system has a GPU to run the container.
features: Install Git within the container for version control.
customizations.vscode.extensions: Adds necessary VS Code extensions for Python, containers, and NVIDIA debugging…
postCreateCommand: Installs Python dependencies from
requirements.txtafter the container builds.
By including a devcontainer.json file in your project repository, you can specify
the Python version and dependencies and any required system packages, VS Code extensions,
environment variables, and even custom scripts to run during setup.
Step 2.4: Add the Script download_model.py
Now, we will create a script to download the Mamba-Codestral-7B-v0.1 model from Hugging Face.
1from huggingface_hub import snapshot_download2from pathlib import Path34# Place you Hugging Face Access Token here5hf_token = "your hf access token"67# Define the model repository and storage path8REPO_ID = "mistralai/Mamba-Codestral-7B-v0.1"9DIR = Path.home().joinpath("mistral_models", "Mamba-Codestral-7B-v0.1")1011# Ensure the directory exists12DIR.mkdir(parents=True, exist_ok=True)1314# Download specific files from the model repository15print(f"Downloading model files from {REPO_ID}...")16snapshot_download(17 repo_id=REPO_ID,18 allow_patterns=["*"],19 local_dir=DIR,20 token=hf_token # Authenticate with Hugging Face21)2223print(f"Model downloaded successfully")
This script uses the Hugging Face snapshot_download method to download the Mamba-Codestral-7B-v0.1 model files. It authenticates using a Hugging Face access token (replace it with your token) and saves the model files in a specified directory (mistral_models). The script ensures the directory exists, downloads all files from the model repository, and provides status messages to confirm the download process.
Step 2.5: Add the Script generate_text.py
We will create a script to generate the text from the Mamba-Codestral-7B-v0.1 model.
1from transformers import AutoTokenizer, AutoModelForCausalLM2import torch3from pathlib import Path45# Define the model path6MODEL_PATH = str(Path.home().joinpath("mistral_models", "Mamba-Codestral-7B-v0.1"))78# Check if GPU is available9device = torch.device("cuda" if torch.cuda.is_available() else "cpu")10if device.type == "cuda":11 print(f"Using GPU: {torch.cuda.get_device_name(0)}")12else:13 print("No GPU found. Using CPU, which may be slower.")1415# Load the tokenizer and model16print("Loading the tokenizer and model...")17tokenizer = AutoTokenizer.from_pretrained(MODEL_PATH)18model = AutoModelForCausalLM.from_pretrained(19 MODEL_PATH,20 load_in_4bit=True,21 device_map="auto",22 torch_dtype=torch.float16,23 bnb_4bit_compute_dtype=torch.float1624)2526print("Model loaded successfully!")2728# Function to generate text with customizable parameters29def generate_custom_text(prompt: str, max_length=100, temperature=0.7, top_p=0.9):30 inputs = tokenizer(prompt, return_tensors="pt").to(device)3132 # Ensure attention mask is set explicitly if the pad_token is same as eos_token33 attention_mask = inputs.get('attention_mask', None)34 if attention_mask is None:35 attention_mask = torch.ones_like(inputs['input_ids'], device=device)3637 with torch.no_grad():38 outputs = model.generate(39 inputs["input_ids"],40 attention_mask=attention_mask,41 max_length=max_length,42 temperature=temperature,43 top_p=top_p,44 do_sample=True,45 pad_token_id=tokenizer.eos_token_id46 )47 return tokenizer.decode(outputs[0], skip_special_tokens=True)4849prompt = "The future of artificial intelligence"50generated_text = generate_custom_text(prompt)51print("Generated text: ", generated_text)
Step 2.6: Add the Script generate_code.py
We will create a script to generate the code from the Mamba-Codestral-7B-v0.1 model.
1from transformers import AutoTokenizer, AutoModelForCausalLM2import torch3from pathlib import Path45# Define the model path6MODEL_PATH = str(Path.home().joinpath("mistral_models", "Mamba-Codestral-7B-v0.1"))78# Check if GPU is available9device = torch.device("cuda" if torch.cuda.is_available() else "cpu")10if device.type == "cuda":11 print(f"Using GPU: {torch.cuda.get_device_name(0)}")12else:13 print("No GPU found. Using CPU, which may be slower.")1415# Load the tokenizer and model16print("Loading the tokenizer and model...")17tokenizer = AutoTokenizer.from_pretrained(MODEL_PATH)18model = AutoModelForCausalLM.from_pretrained(19 MODEL_PATH,20 load_in_4bit=True,21 device_map="auto",22 torch_dtype=torch.float16,23 bnb_4bit_compute_dtype=torch.float1624)2526print("Model loaded successfully!")2728# Function to generate code based on a prompt29def generate_code(prompt: str, max_length=150, temperature=0.7, top_p=0.9):30 inputs = tokenizer(prompt, return_tensors="pt").to(device)3132 # Ensure attention mask is set explicitly if the pad_token is same as eos_token33 attention_mask = inputs.get('attention_mask', None)34 if attention_mask is None:35 attention_mask = torch.ones_like(inputs['input_ids'], device=device)3637 with torch.no_grad():38 outputs = model.generate(39 inputs["input_ids"],40 attention_mask=attention_mask,41 max_length=max_length,42 temperature=temperature,43 top_p=top_p,44 do_sample=True,45 pad_token_id=tokenizer.eos_token_id46 )47 return tokenizer.decode(outputs[0], skip_special_tokens=True)4849prompt = "Write a Python function that calculates the factorial of a number using recursion."50generated_code = generate_code(prompt)51print("Generated Code:\n", generated_code)
Step 2.7: Add the Script bug_finder.py
Now, we will create a script to find the bugs in the code from the Mamba-Codestral-7B-v0.1 model.
1from transformers import AutoTokenizer, AutoModelForCausalLM2import torch3from pathlib import Path45# Define the model path6MODEL_PATH = str(Path.home().joinpath("mistral_models", "Mamba-Codestral-7B-v0.1"))78# Check if GPU is available9device = torch.device("cuda" if torch.cuda.is_available() else "cpu")10if device.type == "cuda":11 print(f"Using GPU: {torch.cuda.get_device_name(0)}")12else:13 print("No GPU found. Using CPU, which may be slower.")1415# Load the tokenizer and model16print("Loading the tokenizer and model...")17tokenizer = AutoTokenizer.from_pretrained(MODEL_PATH)18model = AutoModelForCausalLM.from_pretrained(19 MODEL_PATH,20 load_in_4bit=True,21 device_map="auto",22 torch_dtype=torch.float16,23 bnb_4bit_compute_dtype=torch.float1624)2526print("Model loaded successfully!")2728# Function to detect and suggest fixes for bugs in the code29def bug_finder_in_code(code_snippet: str, max_length=300):30 prompt = f"Identify any bugs in the following code and suggest possible fixes:\n\n{code_snippet}\n\nBug fixes and explanations:"31 inputs = tokenizer(prompt, return_tensors="pt").to(device)3233 # Ensure attention mask is set explicitly if the pad_token is same as eos_token34 attention_mask = inputs.get('attention_mask', None)35 if attention_mask is None:36 attention_mask = torch.ones_like(inputs['input_ids'], device=device)3738 with torch.no_grad():39 outputs = model.generate(40 inputs["input_ids"],41 attention_mask=attention_mask,42 max_length=max_length,43 temperature=0.7,44 top_p=0.9,45 do_sample=True,46 pad_token_id=tokenizer.eos_token_id47 )4849 bug_fix_suggestions = tokenizer.decode(outputs[0], skip_special_tokens=True)50 return bug_fix_suggestions5152code_snippet = '''53def calculate_sum(a, b):54 return a + b55result = calculate_sum(5)56print(result)57'''5859bug_fixes = bug_finder_in_code(code_snippet)60print("Bug Fix Suggestions: ", bug_fixes)
You can update the prompts of your choice and create new custom scripts.
Step 2.8: Create a requirements.txt file
Add a requirements.txt file to specify development dependencies. Include the following content:
1torch2huggingface_hub3transformers4bitsandbytes5accelerate6nvidia-pyindex7safetensors8numpy9protobuf10sentencepiece11mamba-ssm12causal-conv1d
Step 2.9: Initialize, Commit, and Create a GitHub repository
Now, initialize git and commit all your changes to your directory.
1git init2git add .3git commit -m "inital commit"
After committing your code, you will push it to a remote repository of your choice.
1git remote add origin https://github.com/YOUR-GITHUB-USERNAME/YOUR-DIRECTORY-NAME.git2git branch -M main3git push -u origin main
Step 3: Running LLM in Daytona with a Dev Container
Here, you will use Daytona to run LLM, use GitHub as a provider, and open a workspace in VS Code. You should ensure daytona is installed on your machine before proceeding.
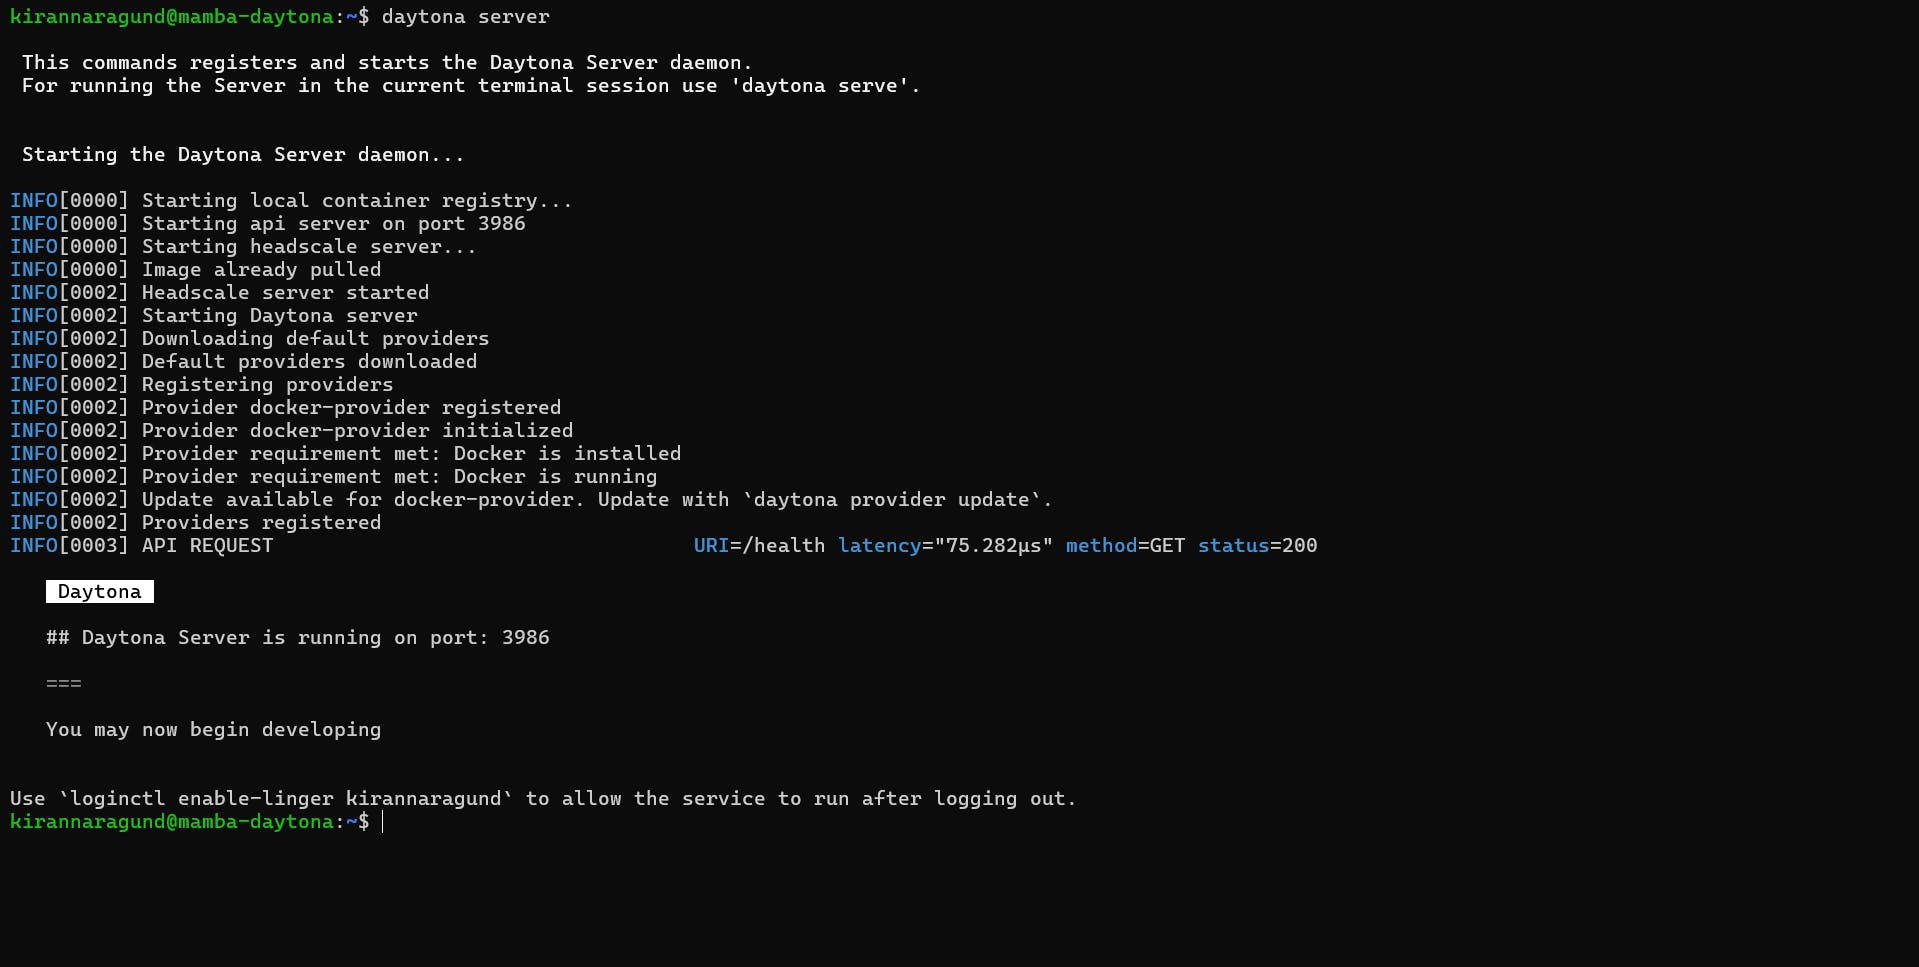
Step 3.1: Start Daytona Server
Start the daytona server by running the command.
1daytona server
Your output should be similar to the screenshot below.
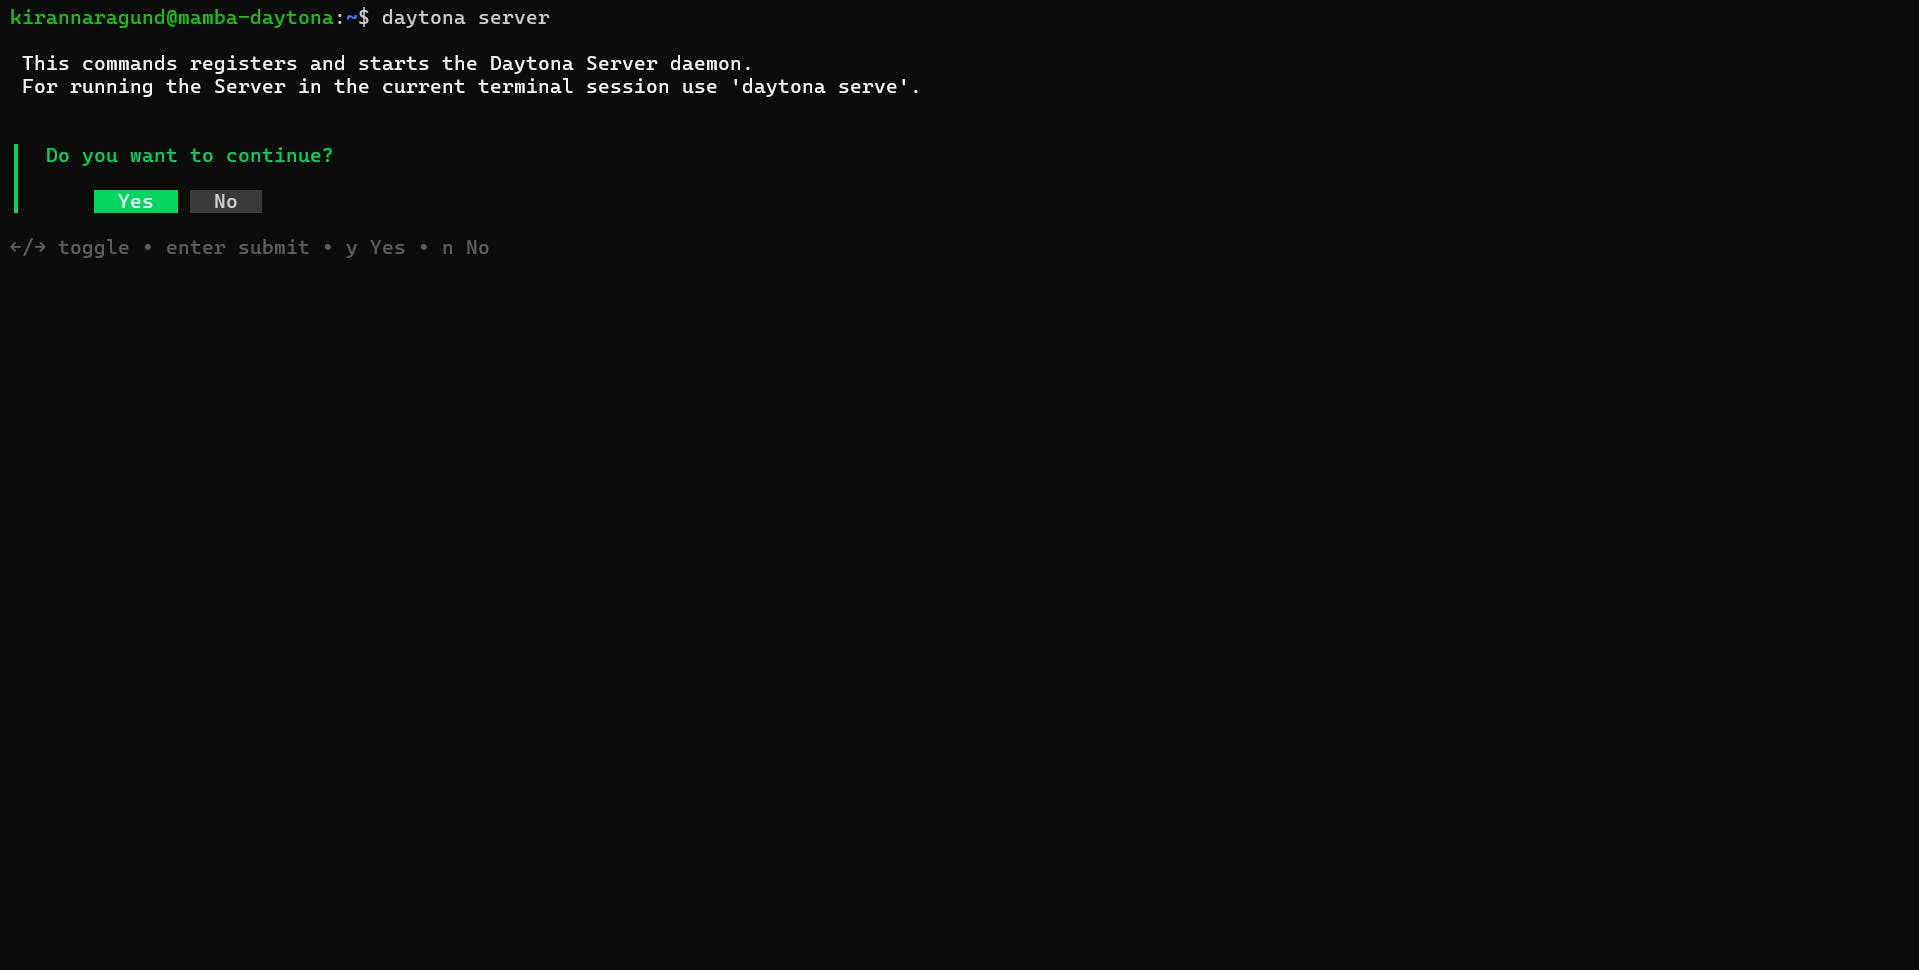
Choose “yes,” you should see a similar output in the screenshot below.
Step 3.2: Add Git Provider
Daytona integrates with your preferred Git provider, streamlining your workflow by allowing direct access to repositories and simplifying workspace creation from existing projects.
Execute the command below to add your Git provider. Daytona also supports other Git providers, such as Bitbucket and GitLab. You can learn more about Daytona Git Providers here.
1daytona git-provider add
Select GitHub and provide your personal access token.
Step 3.3: Choose your preferred IDE
Run this command in the terminal to choose your IDE.
1daytona ide
Step 3.4: Create a Daytona Workspace
Now create a dev environment of the repository you created in GitHub and
follow the prompts after you run it.
1daytona create
Choose GitHub as a provider and select the Mamba-Codestral-DevContainer repository.
Step 3.4.1: Provide workspace name
The name of the workspace is usually the repository name if you didn’t modify it when
prompted in the creation of the workspace.
Step 3.4.2: Choose the target
Now, it will ask you to choose the target, select local, and enter.
Daytona will start creating a workspace by pulling your project and installing all required dependencies. Once you're done, it will open your project in your default IDE.
Now, you are ready to run the LLM within your dev container.
Step 5: Testing is Codestral in Daytona Running
Test the setup by running the LLM model in your VS Code:
1python download_model.py
This will take a few minutes to download the model. Now run the Python scripts you created earlier one by one, and note that outputs may be different in your case.
1python generate_text.py2python generate_code.py3python generate_code.py
Wrapping Up: Successfully Containerizing Mamba-Codestral-7B
Congratulations on setting up a fully containerized development environment to run the Mamba-Codestral model within Daytona. This streamlined workflow enhances your ability to manage Python-based AI projects with greater consistency, simplicity, and efficiency, enabling seamless development and deployment of language and code tasks.