This guide will demonstrate how to integrate Srcbook, an interactive TypeScript notebook environment, with Daytona, a development environment management tool. This integration provides an efficient cloud-based interactive development environment for TypeScript projects. You’ll learn how to set up and run Srcbook within a Daytona-managed container.
TL;DR
Set up a Daytona-managed development environment.
Configure the development environment to auto-launch Srcbook.
Run TypeScript notebooks interactively using Srcbook.
Integrate Daytona and Srcbook for seamless project management.
Step 1: Preparations
Before getting started, ensure you have the following prerequisites:
Docker installed and running on your system. Install Docker
Daytona installed. You can follow the Daytona Installation Guide.
Basic familiarity with
devcontainer.jsonfor setting up development containers. Learn more here.
Example Preparations
Step 1.1: Install Docker and verify it’s running.
docker --version
Confirm Docker is installed by running the above command. The output should display the Docker version.
Step 1.2: Install Daytona and ensure that Daytona is properly installed by verifying the
daytonacommand is recognized.
Step 2: Main Process
This section covers creating a starter repository, setting up a devcontainer.json file, and configuring Daytona to launch Srcbook.
Step 2.1: Creating a Starter Repository
Create a GitHub Repository: Start by creating a new GitHub repository for your Srcbook project.
Clone the Repository to your local machine:
git clone https://github.com/<your-username>/srcbook-project.git
cd srcbook-project
Step 2.2: Setting Up the devcontainer.json File
In the root of your repository, create a .devcontainer directory and add the devcontainer.json file:
1mkdir .devcontainer2touch .devcontainer/devcontainer.json
Now, open the devcontainer.json file and add the following configuration:
1{2 "name": "Srcbook Development",3 "image": "mcr.microsoft.com/devcontainers/typescript-node:1-20",4 "postCreateCommand": "npm install -g srcbook",5 "postAttachCommand": "srcbook start",6 "forwardPorts": [2150]7}
Note:
Post Commands: Automatically install necessary packages and start Srcbook after the container is created.
Forward Ports: Ensures Srcbook runs on
localhost:2150as specified in the devcontainer.json file.
Step 2.3: Launching the Devcontainer and Daytona
Launch the Container: Open the repository in VSCode. It will prompt you to reopen the folder in a container. This will create the dev environment using the devcontainer.json configuration.
Start Daytona:
Once inside the development container, start Daytona by running:daytona serverDaytona will now be ready to manage the Srcbook project.
Step 2.4: Creating a New Srcbook Project
With Daytona running and the environment set up, you can now create a repository with a devcontainer for Srcbook
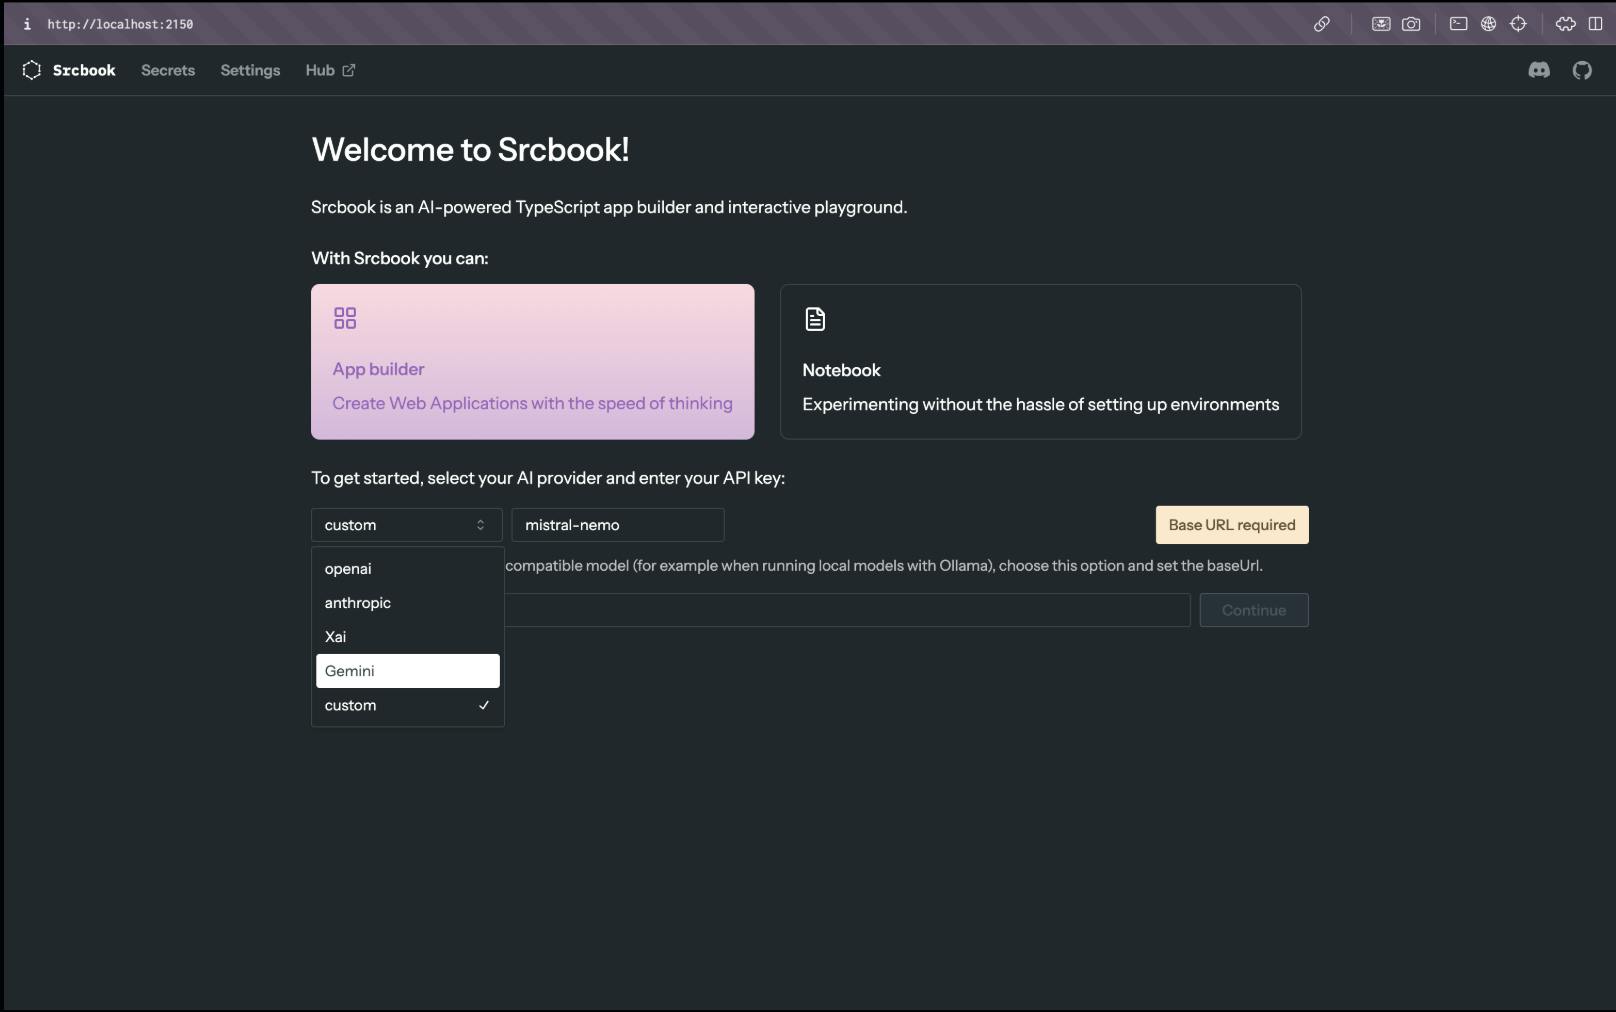
Step 2.5: Adding API Tools API Key
To configure your development environment with the required API key, follow these steps:
Go to the API tools dashboard.
Navigate to the “API Keys” section.
Click “Generate New Key” and copy the key.
Example
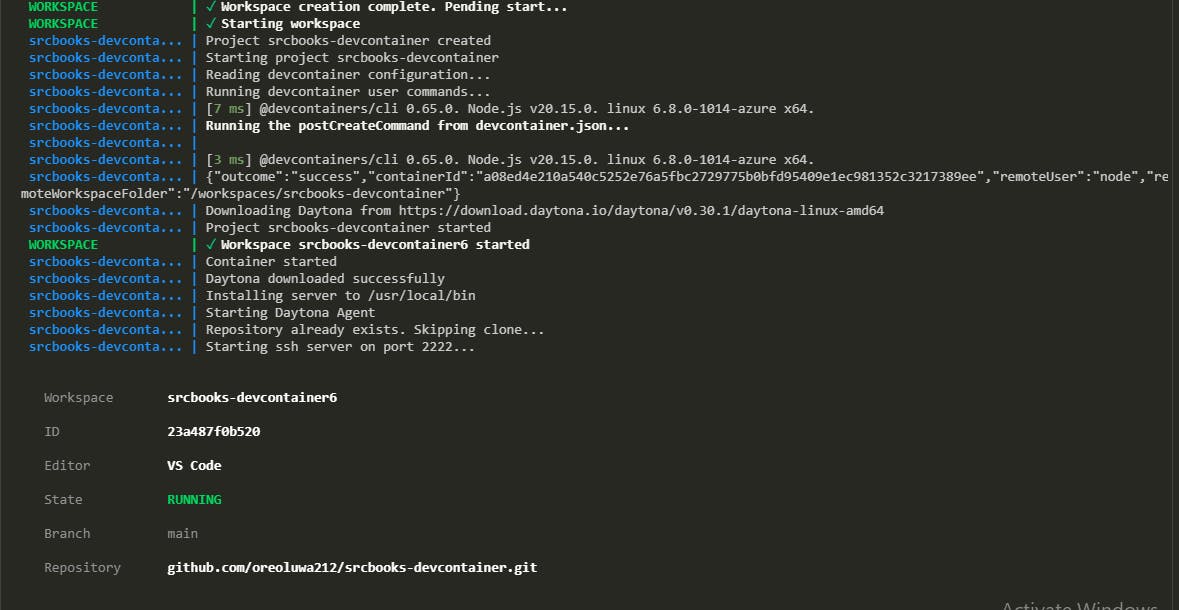
1daytona create https://github.com/oreoluwa212/srcbooks-devcontainer

This command will generate a new TypeScript notebook for interactive coding.
Step 2.5: Running Srcbook
Once your interactive TypeScript notebook environment, you can proceed to open with your preferred IDE following this daytona IDE docs
Step 3: Confirmation
To confirm that your setup is correct, ensure the following:
Docker engine is up and running.
Daytona server is running, and you can check the status at
localhost:3986/healthYour interactive notebook is up and ready for use.
Tip: If you see any errors, review your devcontainer.json for misconfigurations or restart Daytona using:
1daytona serve
Step 4: Running the Srcbook Project
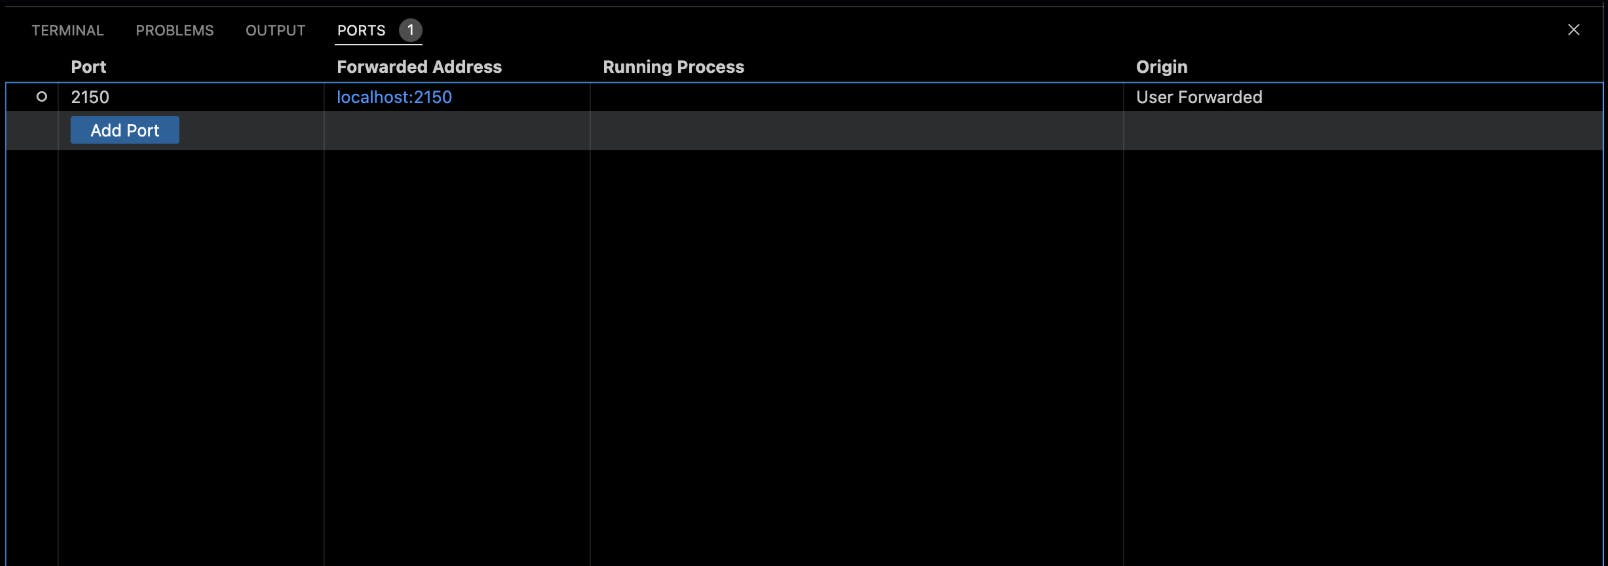
4.1 Access Methods
Open via Daytona web interface
Use VSCode Remote Containers extension
Access through forwarded port
localhost:2150
4.2 First Notebook
Create a sample TypeScript notebook to verify setup:
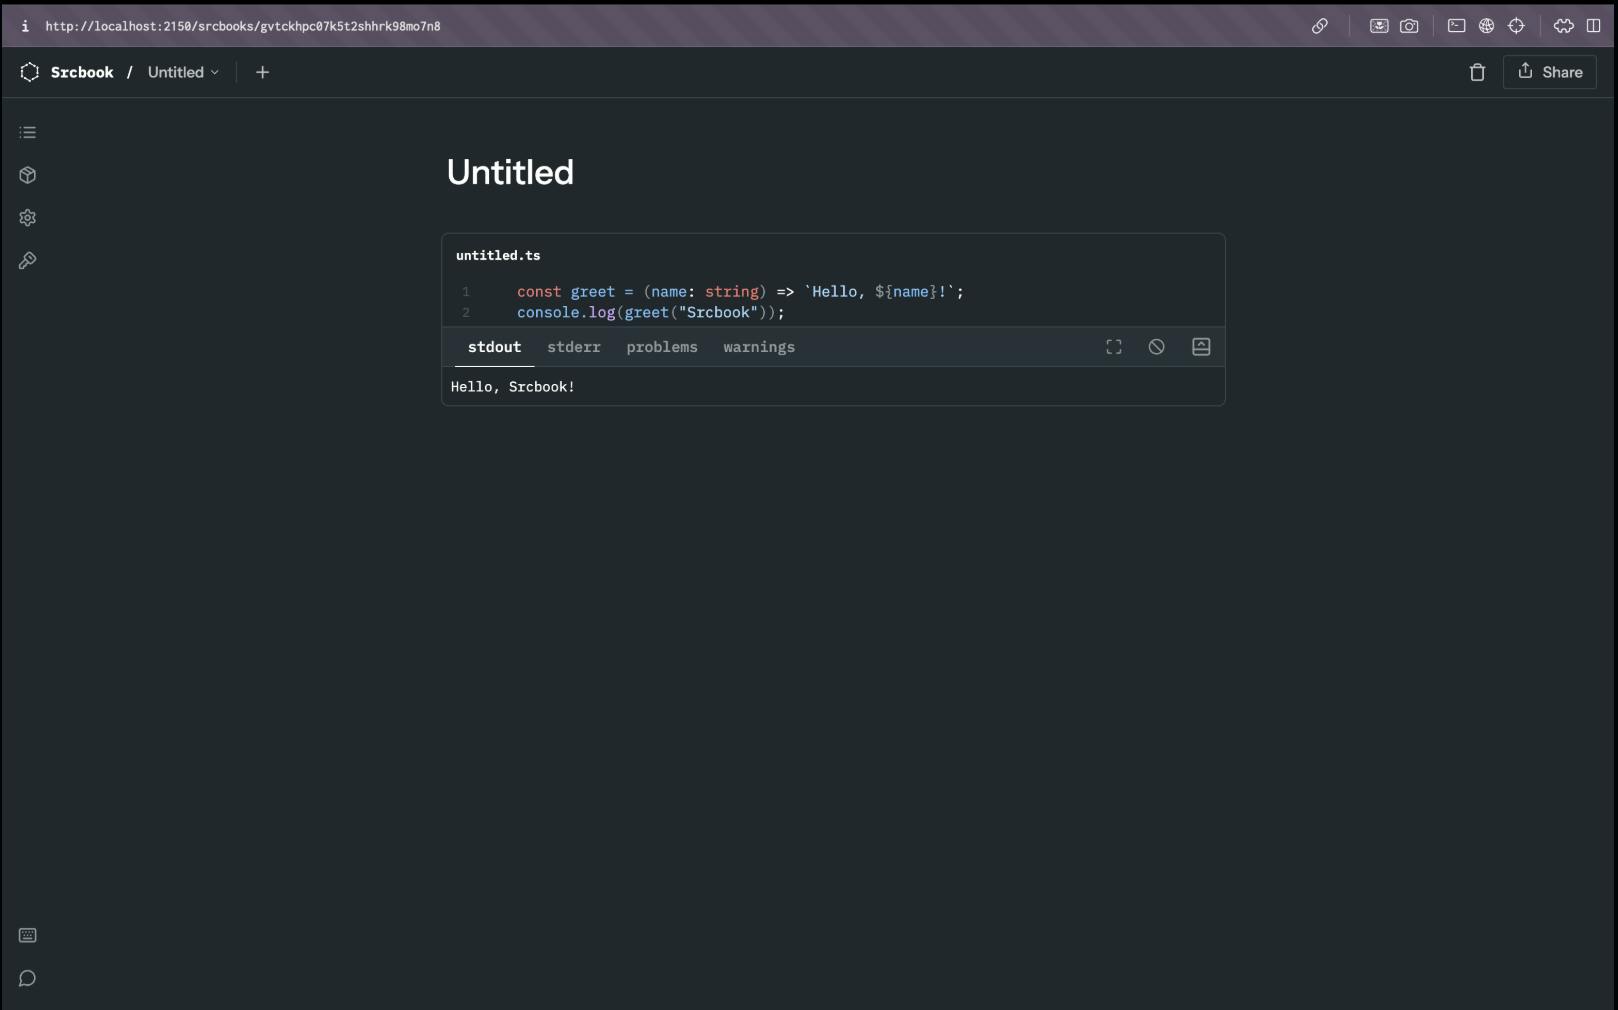
1const greet = (name: string) => `Hello, ${name}!`;2console.log(greet("Srcbook"));
Sample TypeScript Srcbook Screenshot
Below is an example of a TypeScript notebook in Srcbook. The screenshot demonstrates a simple greet function:
Step 5: Tips for Effective Use
5.1 Environment Management
Always use
.devcontainer.jsonfor consistent setupsCommit and push notebook changes regularly to preserve your interactive coding progress
Use environment variables for configuration, Use lock files (
package-lock.jsonoryarn.lock) to ensure consistent environmentsUnderstand that Srcbook notebooks maintain state between cells, use this to create sequential, context-aware computational workflows
Be mindful of memory usage in long-running notebooks, use
deleteor reassign large variables to free up memory
5.2 Workspace Best Practices
Commit
devcontainer.jsonto version controlUse console.log() and breakpoints effectively in Srcbook
Document any specific configuration or setup steps in a
READMEUse Daytona’s workspace management for team consistency
Use GitHub Actions or similar tools to validate notebook execution
Export notebook results as part of your documentation or reporting process
5.3 Common Issues and Troubleshooting
Problem 1: Container Fails to Start
Solution: Ensure that Docker is running on your machine. Run docker ps to verify the status.
Problem 2: Daytona Unable to Connect
Solution: Check that Daytona is running correctly by using:
1daytona2# Check Daytona workspace status3daytona list45# Restart workspace6daytona restart <workspace-name>78# View workspace logs9daytona logs <workspace-name>
Conclusion
By following this guide, you’ve successfully integrated Srcbook with Daytona, creating an efficient cloud-based TypeScript notebook environment. This guide demonstrated how to integrate Srcbook with Daytona, creating a powerful, reproducible TypeScript notebook development environment. By following these steps, you can streamline your development workflow and ensure consistent, shareable coding experiences.