Backstage—an open-source platform initially developed by Spotify and now part of CNCF—has transformed how developers manage their workflows. It centralizes all infrastructure tools, services, and documentation, offering a customizable environment where teams can manage projects, streamline workflows, and boost productivity. For more information, visit the official Backstage website.
This guide aims to walk you through setting up Backstage and building a custom plugin to tailor the platform to your specific needs. Whether you're new to Backstage or looking to expand its capabilities, this guide will help you navigate the process with ease.
But setting up such a powerful platform can be complex. Configuration issues, dependency conflicts, and environment inconsistencies are common hurdles that can slow down your progress.
This is where Daytona comes into play.
Daytona simplifies Development Environment Management (DEM) by ensuring a consistent, repeatable, and easily deployable workspace across any platform. By using Daytona in this guide, you'll experience a smoother Backstage setup, allowing you to concentrate on what truly matters—building and shipping great applications.
Features Backstage Provides to Developers
Backstage isn’t just a developer portal—it’s a powerful platform that centralizes and simplifies managing your organization’s services and tools. Here are some key features that make it indispensable for development teams.
Software Catalog:
Backstage's Software Catalog is a centralized directory for all services within your organization. It offers a clear, searchable overview of each service, including ownership and status, making it easy for teams to manage and discover the necessary tools.
Software Templates:
Software Templates in Backstage automate the creation of new projects or components, ensuring consistency and speeding up onboarding. With these templates, teams can quickly start new projects that adhere to organizational standards.
TechDocs:
TechDocs is Backstage’s built-in documentation generator, allowing teams to create and maintain project documentation using Markdown. This feature ensures that all documentation is easily accessible and up-to-date, promoting better knowledge sharing.
Plugin Support:
Backstage’s Plugin Support allows for extensive customization, with a wide range of open-source plugins available for integration. Additionally, teams can develop custom plugins to extend the platform's functionality, tailoring it to their specific needs.
Setting Up the Development Environment
Efficient development setups are crucial to maximizing productivity. In this guide, we'll simplify your workflow using a pre-configured repository with a Backstage starter app, ready for you to clone and build on.
For a complete codebase, including all components, configurations, and setup files discussed in this guide, check out our GitHub repository https://github.com/daytonaio-experiments/starter-backstage
To optimize the development environment, we'll also utilize Daytona to ensure a smooth and streamlined setup.
Before setting up your environment for Backstage, let's ensure you have the tools and a basic understanding to follow along smoothly. Here are the prerequisites you'll need:
Prerequisites
Preinstalled Daytona
Docker installed
Knowledge of React and Nodejs applications
Setting up Daytona for Development Workspace
Setting up a local development environment often involves challenges like version conflicts and configuration headaches. Daytona automates the setup of a Node.js environment, handles port forwarding smoothly, and executes essential post-setup commands, delivering a consistent, ready-to-use development environment with minimal manual effort.
For detailed instructions on getting Daytona installed and configured, visit the Daytona installation documentation. This guide walks you through the process, ensuring your development environment is optimized and hassle-free.
Cloning and Setting Up Your Environment for Backstage
Start Daytona Server:
Open your terminal and start Daytona server using following command:
1daytona serve
Create and Open in Daytona Workspace:
1daytona create https://github.com/daytonaio-experiments/starter-backstage.git
After following these commands, the Backstage repository will open in your preferred IDE.
Setting Up SSO for Backstage:
To enable Single Sign-On (SSO) for your Backstage application, you need administrative access to your GitHub organization. If you don't have an organization, you can create one by navigating to GitHub Organizations.
Once you have an organization, proceed to create a new OAuth App:
Navigate to GitHub OAuth Apps and create a new OAuth App for your GitHub user.
For organization-wide integration, go to
https://github.com/organizations/<Organization_Name>/settings/applications.
To register the application, follow these steps:
Application Name: Choose a name to help users recognize the application, like "Local Backstage."
Homepage URL: Enter
http://localhost:3000for local development.Application Description: Provide a brief description, such as "Local testing of Backstage SSO."
Authorization Callback URL: Use
http://localhost:7007/api/auth/github/handler/frameas the callback URL.Register Application: Complete the setup by clicking the "Register application" button.
GitHub will provide you with a Client ID and Client Secret. Add these to your .env file:
1GITHUB_CLIENT_ID=<ClientId>2GITHUB_CLIENT_SECRET=<ClientSecret>
Next, configure your GitHub organization in the app-config.yaml file to enable catalog ingestion:
1catalog:2 providers:3 githubOrg:4 id: github5 githubUrl: https://github.com6 orgs: ['<Your_Organization_Name>']
Enabling GitHub Integrations
Now that we are allowing users to sign in to Backstage, we should allow them to create some software and register entities in GitHub. This can be done through personal access token.
Generate a Personal Access Token via the GitHub token creation page.
Ensure that the
repoandworkflowpermissions are selected for scaffolding repositories.Update your
.envfile with the generated token.
1GITHUB_TOKEN=<PAT_TOKEN>
Running your Backstage Application
Run your Backstage Application using command:
1yarn dev
Your Backstage Application will now be up and running.
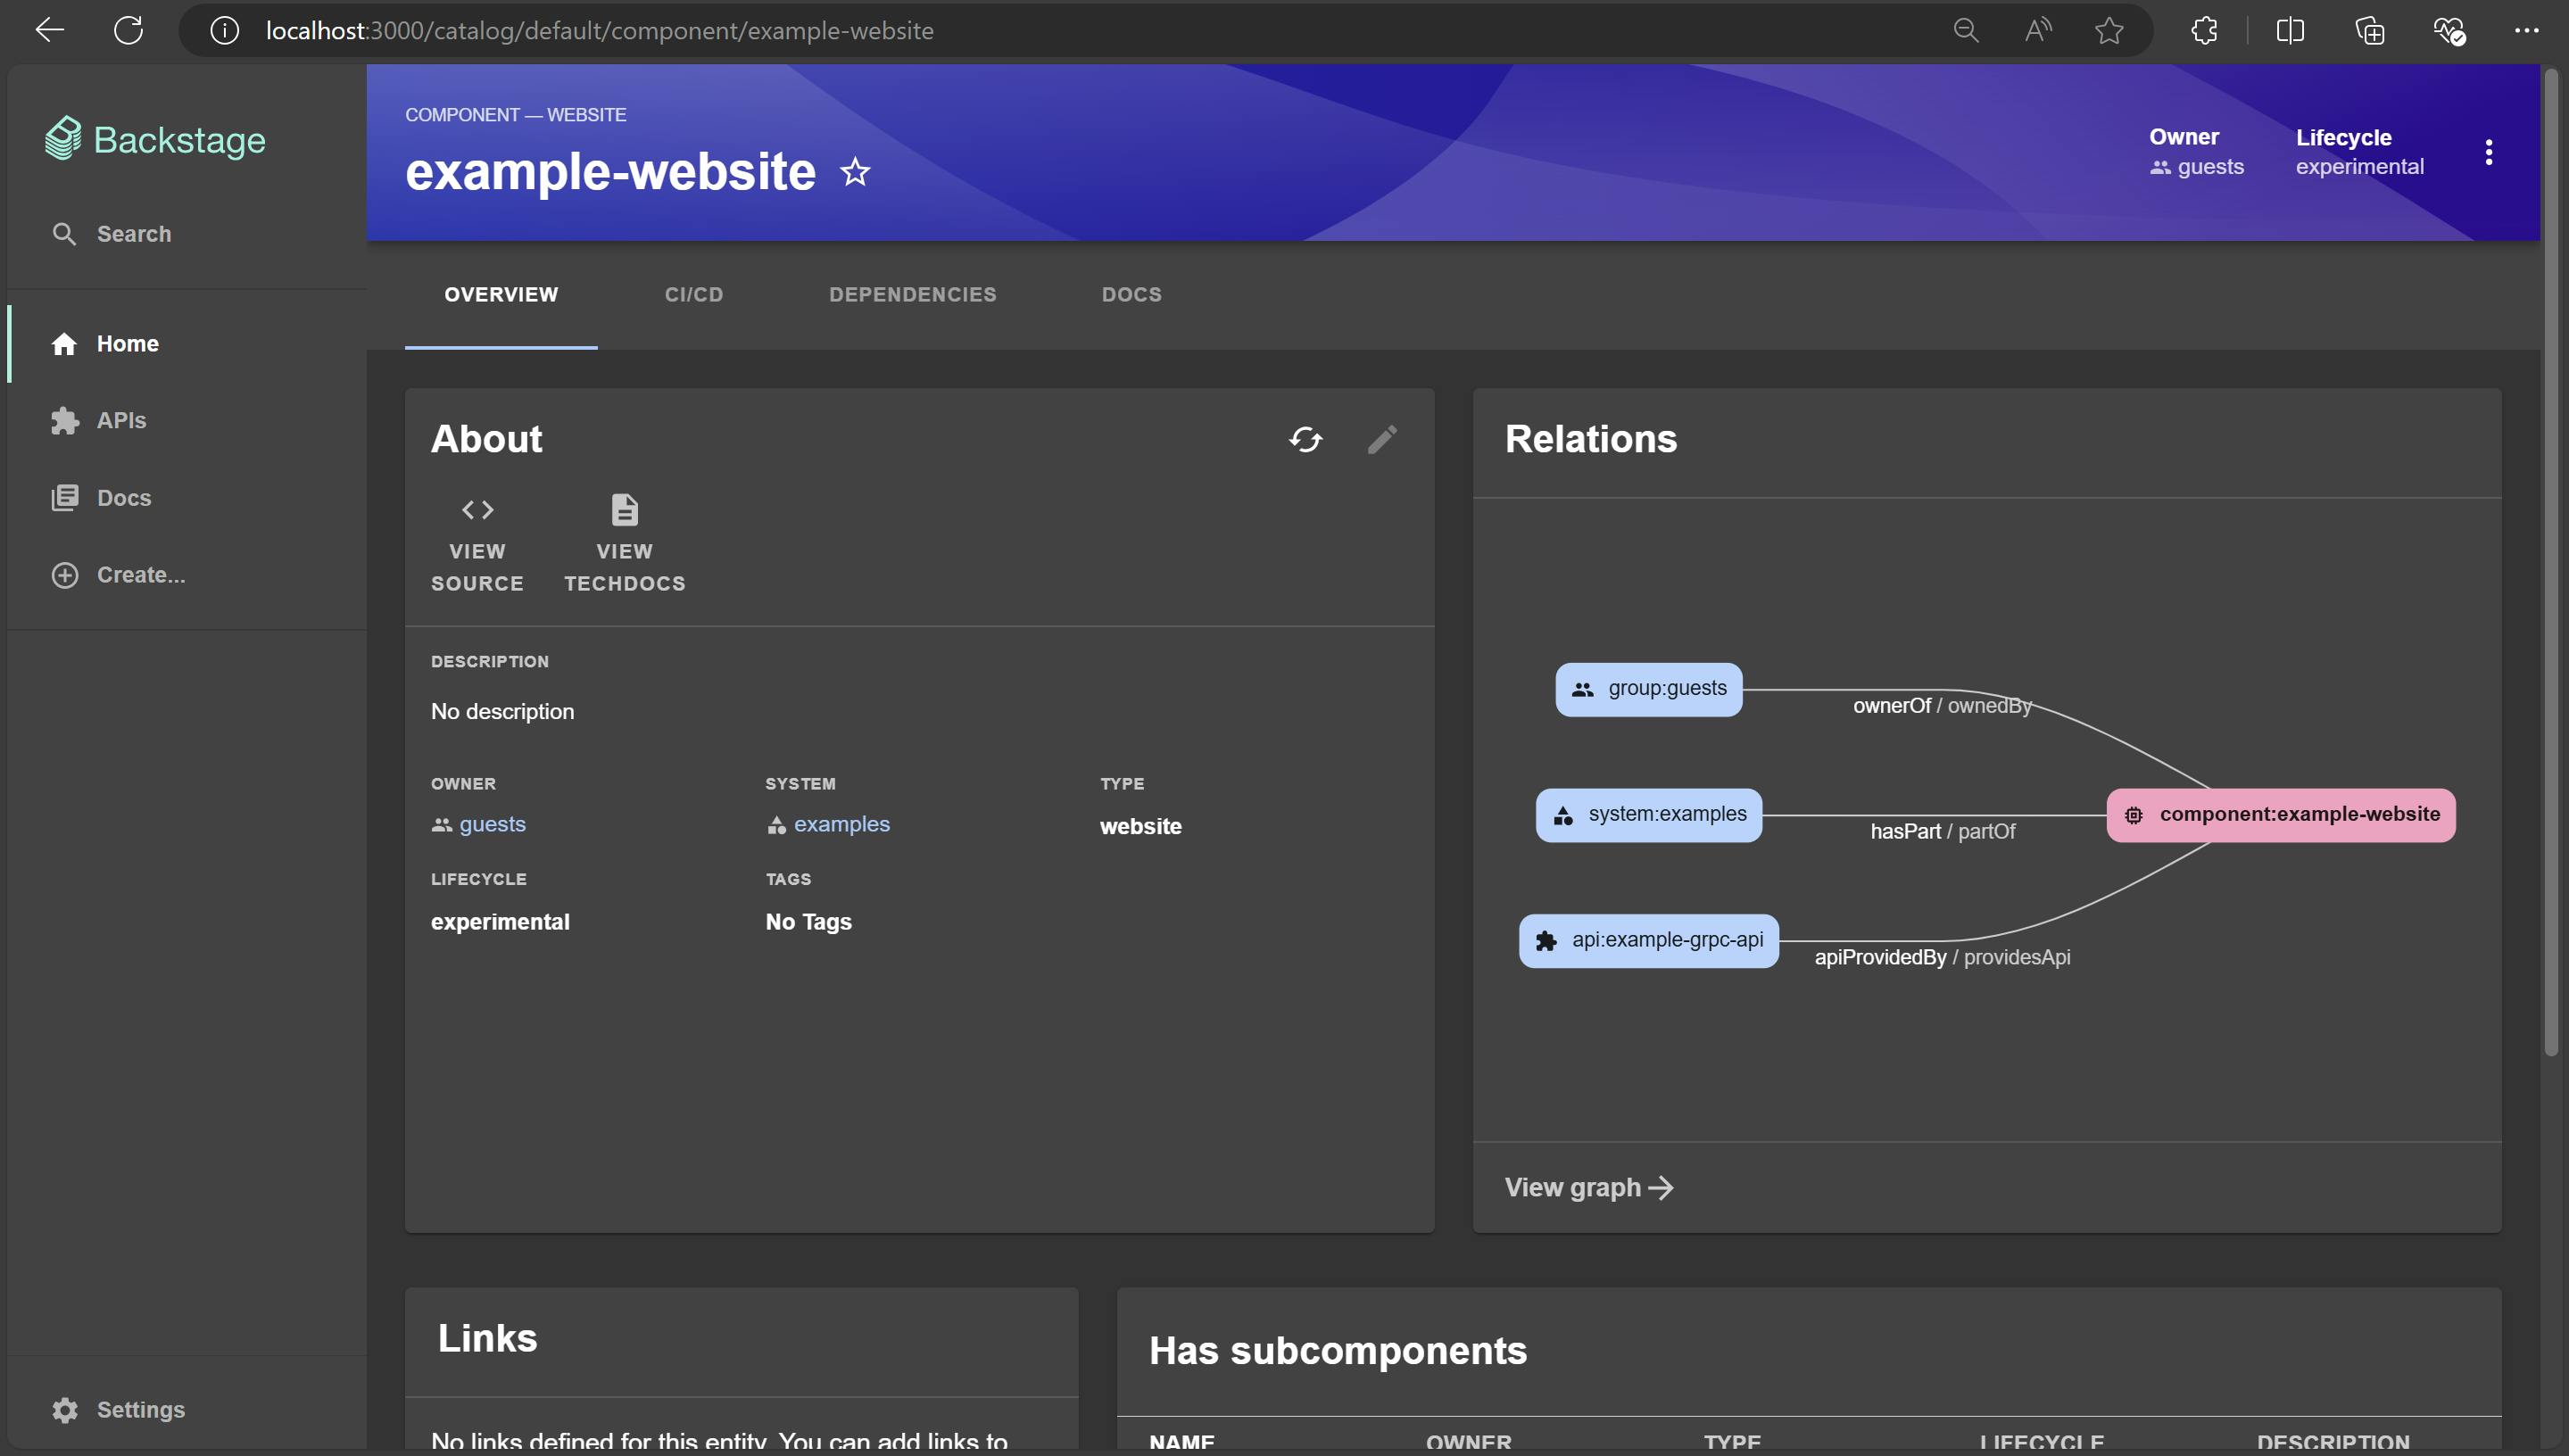
Seamless Setup: Daytona Meets Dev Container
By automating the setup and maintenance of development environments, Daytona enables developers to focus on core tasks, reducing time spent on non-productive activities and increasing overall efficiency.
Daytona enhances developer productivity by offering a standardized and scalable platform. It allows developers to quickly set up and access their development environments from anywhere, eliminating the need for local machine configurations.
Daytona streamlines the setup process of our Backstage application, ensuring a consistent and efficient development experience across different machines.
Using devcontainer.json configuration provides a predefined development environment using Docker containers. Here’s the configuration used in this project:
1{2 "name": "Backstage Dev Container",3 "image": "ubuntu:22.04",4 "features": {5 "ghcr.io/devcontainers/features/common-utils:2.4.7": {6 "username": "daytona",7 "userUid": 1000,8 "userGid": 1000,9 "configureZshAsDefaultShell": true10 },11 "ghcr.io/devcontainers/features/node:1": {12 "nodeGypDependencies": true,13 "version": "18",14 "nvmVersion": "0.39.5"15 },16 "ghcr.io/devcontainers-contrib/features/typescript:2": {},17 "ghcr.io/devcontainers/features/git:1": {}18 },19 "overrideFeatureInstallOrder": [20 "ghcr.io/devcontainers/features/common-utils",21 "ghcr.io/devcontainers/features/git",22 "ghcr.io/devcontainers/features/node",23 "ghcr.io/devcontainers-contrib/features/typescript"24 ],25 "runArgs": ["--network=host"],26 "customizations": {27 "vscode": {28 "extensions": [29 "esbenp.prettier-vscode",30 "dbaeumer.vscode-eslint",31 "streetsidesoftware.code-spell-checker",32 "ms-vscode.vscode-typescript-next"33 ]34 }35 },36 "forwardPorts": [37 3000,38 700739 ],40 "portsAttributes": {41 "3000": {42 "label": "Frontend",43 "onAutoForward": "notify"44 },45 "7007": {46 "label": "Backend",47 "onAutoForward": "ignore"48 }49 },50 "containerEnv": {51 "HOST": "0.0.0.0"52 },53 "workspaceFolder": "/workspaces/starter-backstage",54 "postCreateCommand": "yarn install",55 "remoteUser": "daytona"56}
This configuration includes:
name: Specifies the name of the development environment as "Backstage Dev Container."
image: Uses the
ubuntu:22.04Docker image as the base for the development environment.features:
common-utils: Adds common utilities with configurations for the user "daytona" (UID: 1000, GID: 1000) and sets Zsh as the default shell.
node: Installs Node.js version 18 with dependencies for
node-gypand manages Node versions using NVM 0.39.5.typescript: Adds TypeScript support for the development environment.
git: Installs Git to manage source code versioning.
overrideFeatureInstallOrder: Specifies the order of feature installation to ensure common utilities, Git, Node.js, and TypeScript are set up in the correct sequence.
runArgs: Uses the
--network=hostargument to ensure the container shares the host's network, simplifying network configurations for development.customizations: Installs essential Visual Studio Code extensions, including Prettier, ESLint, a spell checker, and TypeScript Next.
forwardPorts: Sets up port forwarding for the frontend (3000) and backend (7007) servers.
portsAttributes: Labels the forwarded ports with "Frontend" for 3000 and "Backend" for 7007. The frontend port will notify on auto-forward, while the backend port will be ignored.
containerEnv: Sets the environment variable
HOSTto0.0.0.0, ensuring that the application is accessible on all network interfaces.workspaceFolder: Sets the workspace folder to
/workspaces/starter-backstageto match the local workspace folder name.postCreateCommand: Runs
yarn installto automatically install project dependencies when the container is created.remoteUser: Sets "daytona" as the remote user for running commands within the container.
Building and Customizing Plugins in Backstage
Backstage plugins are small, self-contained applications that run within the Backstage platform. Each plugin is designed to address a particular use case or integrate with a specific service, such as CI/CD pipelines, monitoring tools, or cloud providers. By using plugins, you can create a seamless, unified interface for all your development tools, streamlining workflows and improving efficiency.
How Are Plugins Useful?
Customization: Tailor Backstage to meet specific organizational needs.
Integration: Seamlessly connect with external tools and services.
Automation: Automate repetitive tasks to streamline workflows
Steps to Create a Custom Backstage Plugin
Step 1: Create a Backstage Plugin
From the root of your project, use the following command to create a new plugin:
1yarn new --select plugin
This command will invoke the Backstage CLI to generate a new plugin based on the provided ID (example: simple-plugin).
The plugin will be automatically built and added to your Backstage App.
If your Backstage App is already running (via yarn start or yarn dev), you can view the default page for your new plugin by navigating to:
http://localhost:3000/simple-plugin
Step 2: Simplifying to a "Hello World!" Plugin
When the plugin is generated, the CLI scaffolds several files in the plugins/my-plugin directory.
To create a simple "Hello World" plugin, strip down the contents of
\plugins\simple-plugin\src\components\ExampleComponent\ExampleComponent.tsxto the following:
1import React from 'react';2import { Content, Page } from '@backstage/core-components';34export const ExampleComponent = () => (5 <Page themeId="tool">6 <Content>7 <h1>Hello, World!</h1>8 <p>This is your simple plugin.</p>9 </Content>10 </Page>11);
As the component has been significantly simplified, you can remove unnecessary files such as the test file
ExampleComponent.test.tsxand the entireExampleFetchComponentfolder.Your plugin has been reduced to a minimal "Hello World!" setup and is ready for further development.
Step 3: Integrate into the Software Catalog
Remove the following lines from
packages/app/src/App.tsxto avoid direct routing:
1import { SimplePluginPage } from '@internal/backstage-plugin-simple-plugin';2...3<Route path="/simple-plugin" element={<SimplePluginPage />}/>
Add the following lines to
packages/app/src/components/catalog/EntityPage.tsxto include your plugin as tabbed content:
1import { SimplePluginPage } from '@internal/backstage-plugin-simple-plugin';2...3const serviceEntityPage = (4 <EntityLayout>5 ...6 <EntityLayout.Route path="/simple-plugin" title="My Plugin">7 <SimplePluginPage />8 </EntityLayout.Route>9 </EntityLayout>10);
Rebuild or restart the Backstage App image.
Create a new GitHub repository
(e.g., my-simple-plugin-component)with acatalog-info.yamlfile:
1apiVersion: backstage.io/v1alpha12kind: Component3metadata:4 name: my-simple-plugin-component5spec:6 lifecycle: production7 owner: my-team8 type: service
Use the
HOME > CREATE > REGISTER EXISTING COMPONENTbutton to register your service component using the link to thecatalog-info.yamlfile.
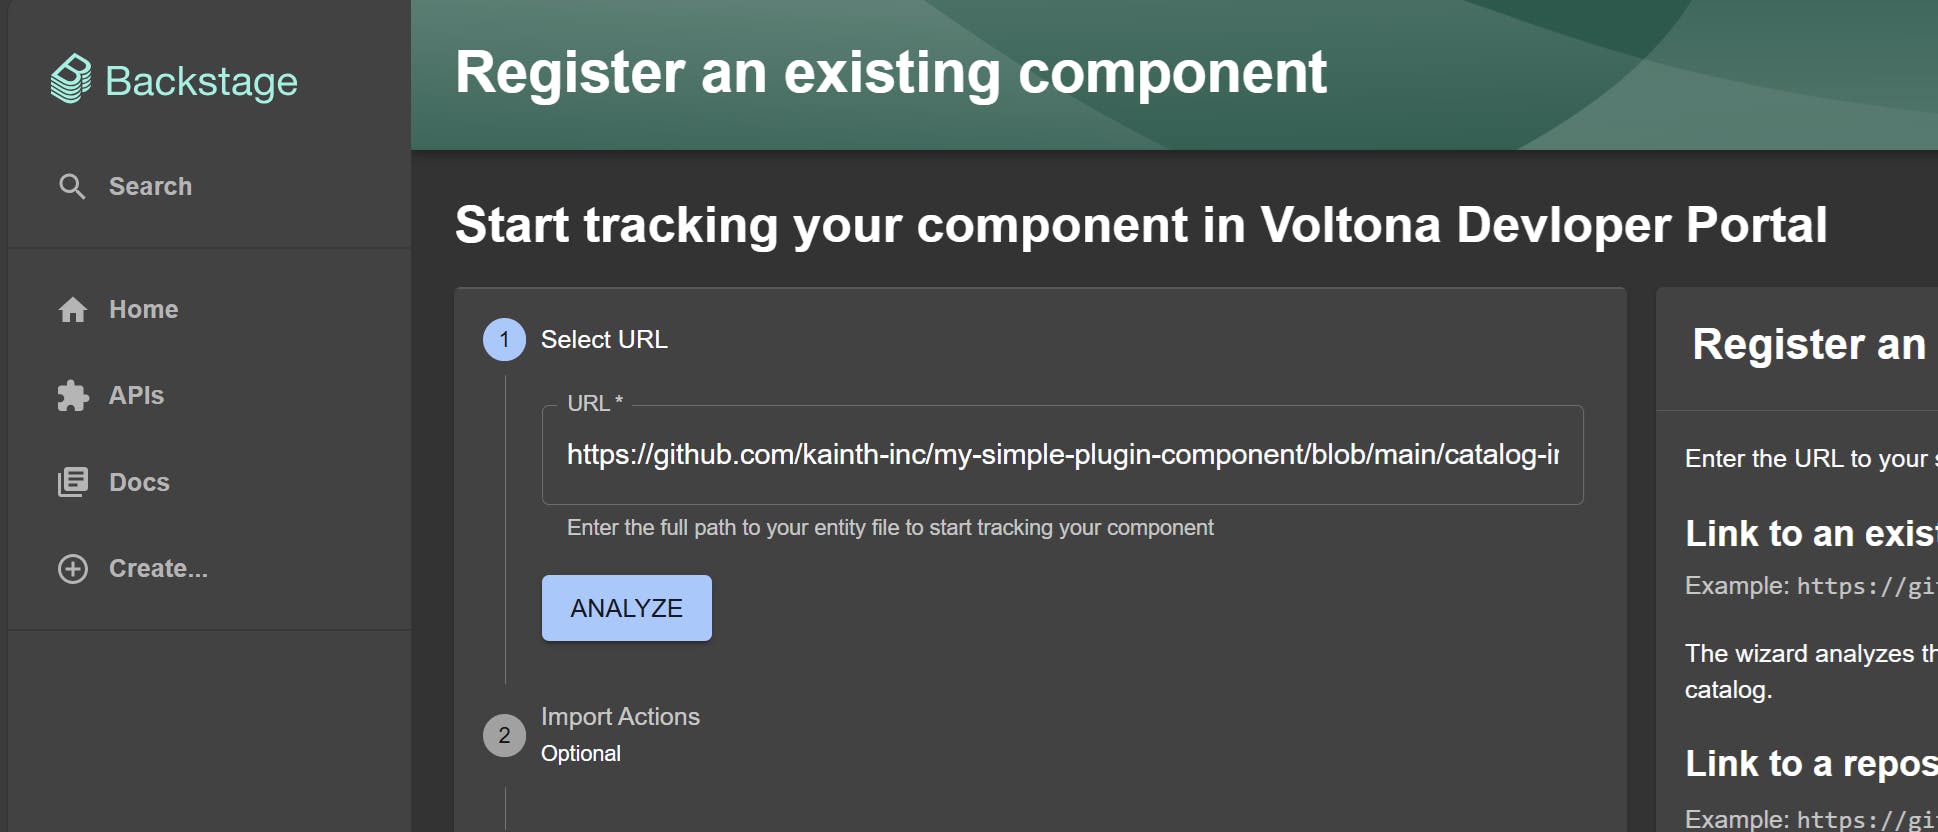
Once registered, you can navigate to the component and use the
MY PLUGINtab to display your plugin’s UI.
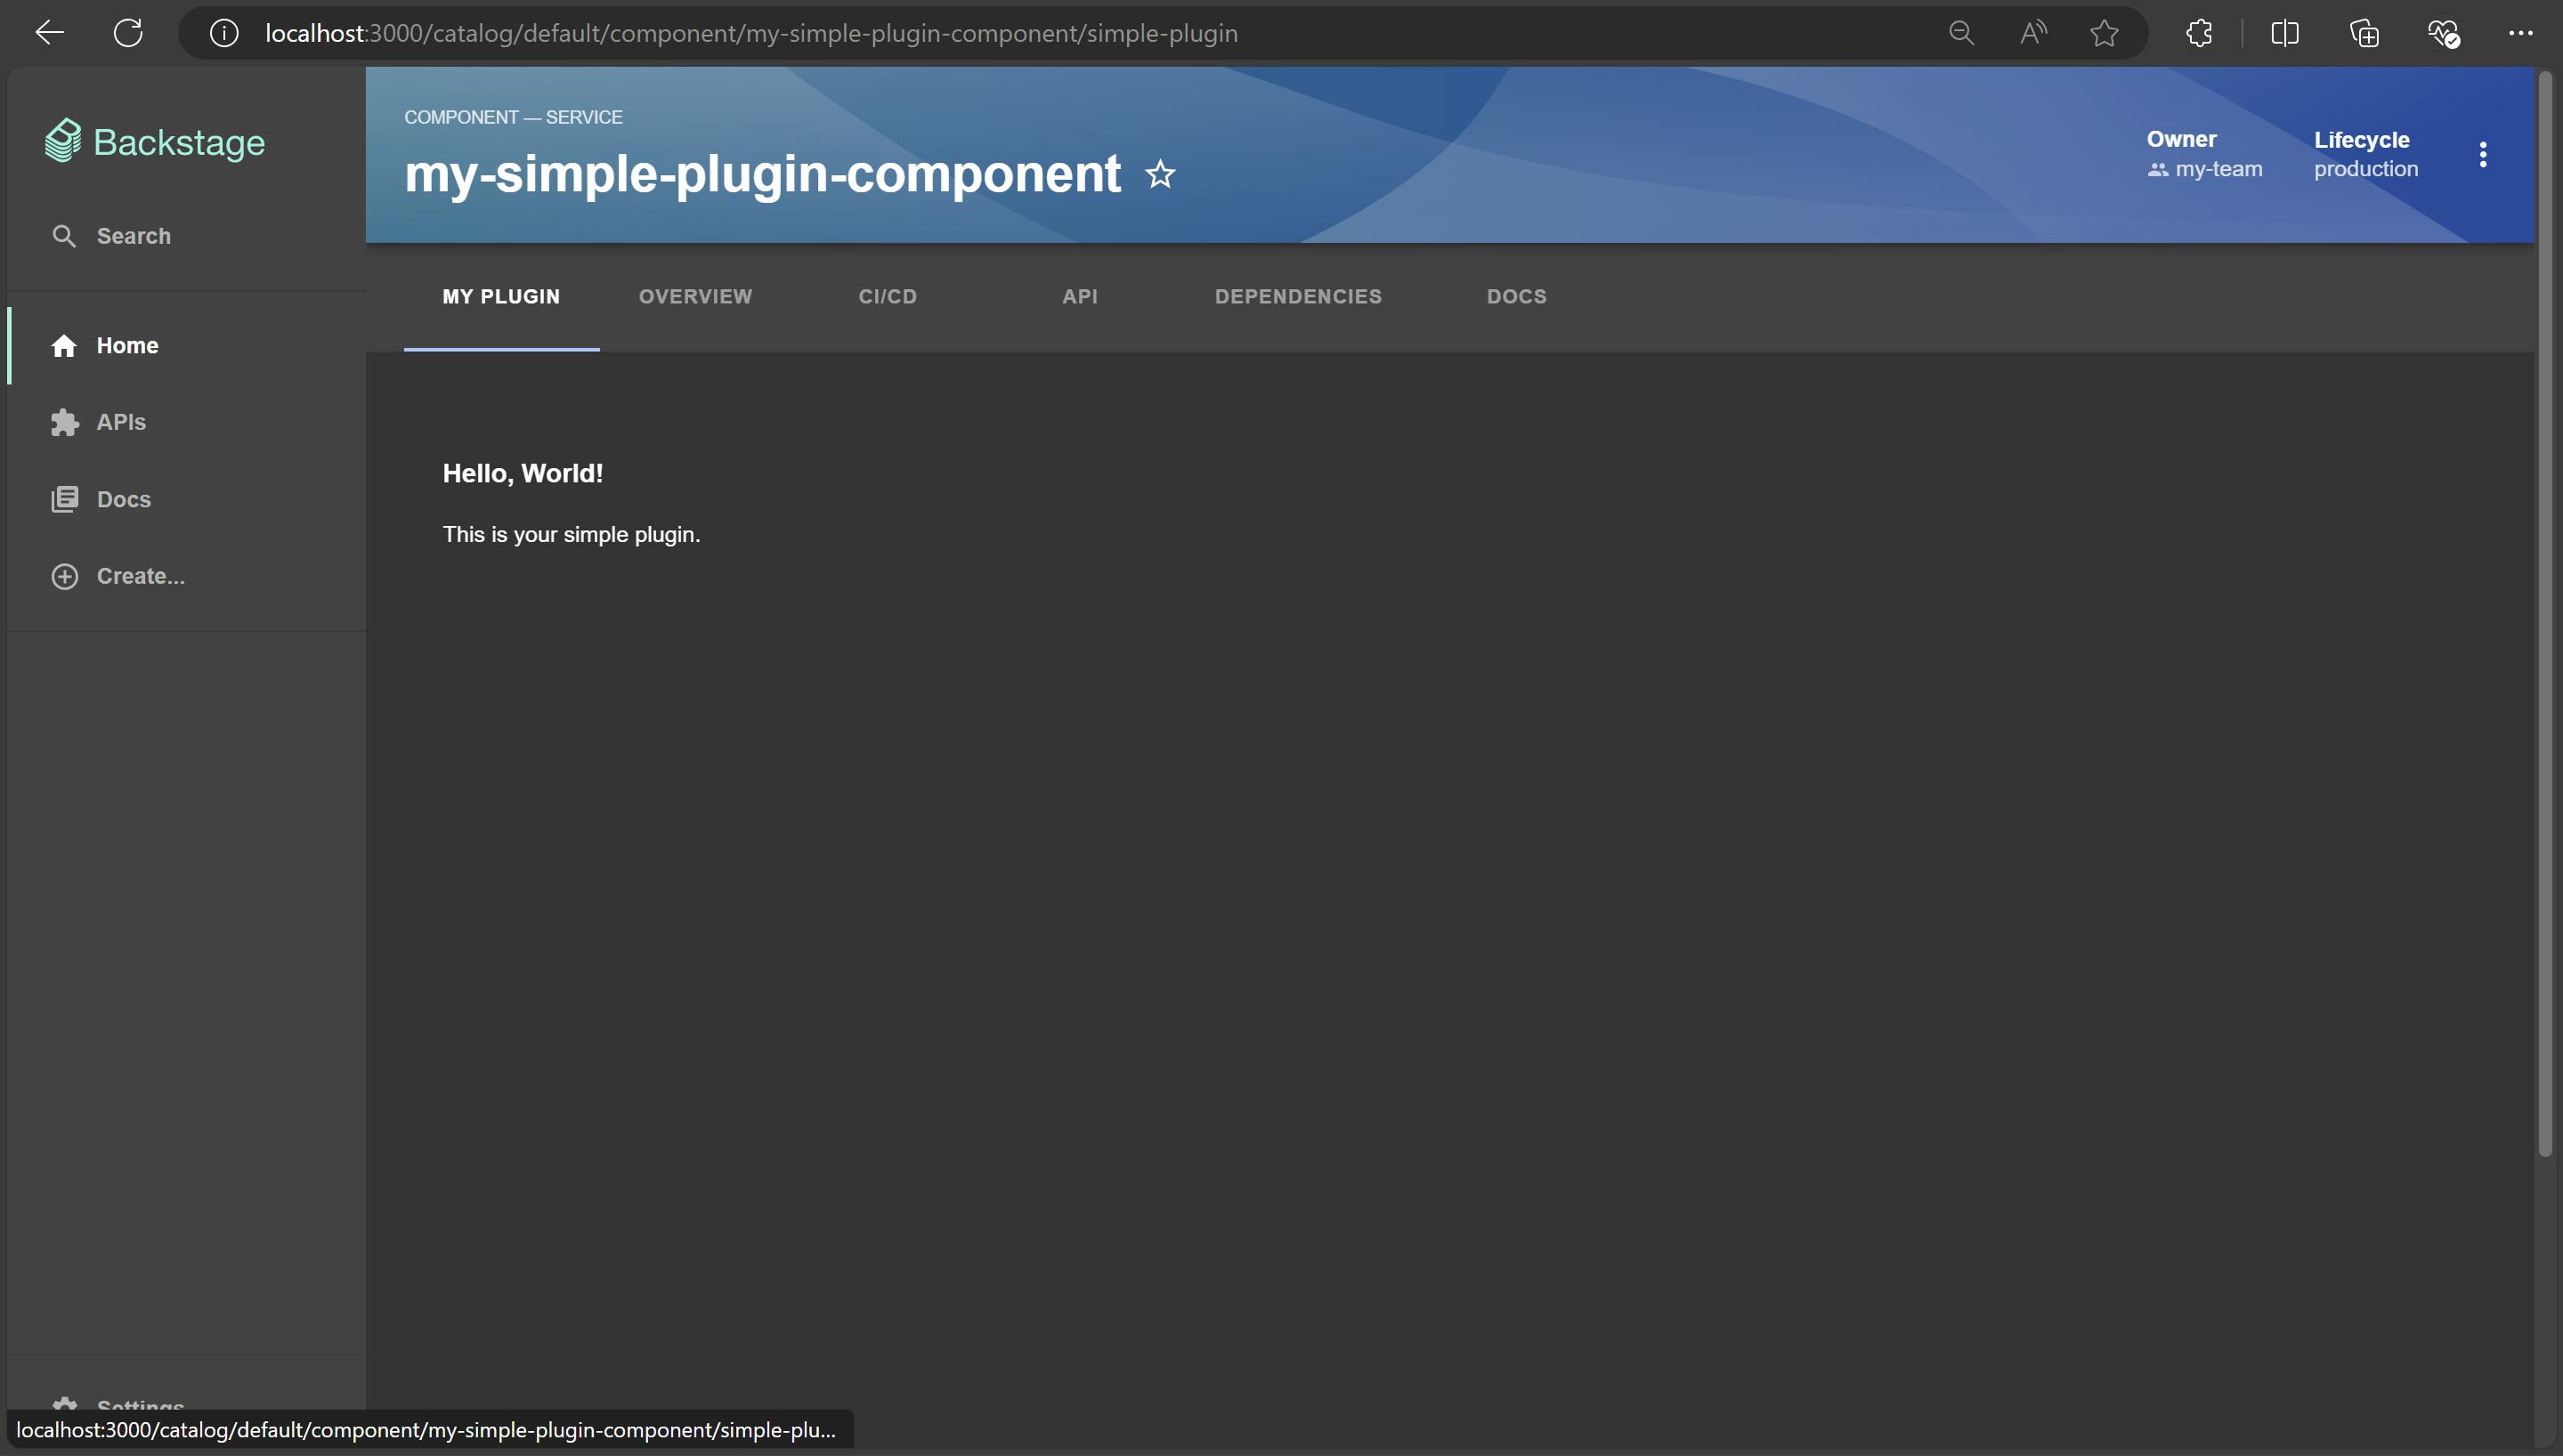
Now that you've created and integrated a custom plugin in Backstage, you’ve added a powerful tool to your developer portal. This plugin can now serve your team’s specific needs, making your workflows smoother and more efficient.
Conclusion
Congratulations! You have successfully set up your Backstage environment and explored the basics of building custom plugins. With Daytona, you've ensured a consistent and efficient development environment, simplifying the setup process and boosting productivity. By using Daytona's capabilities, you've overcome the complexities of local setup, providing a seamless and uniform workspace for all developers involved.
Now, you can focus on expanding and customizing your Backstage platform without worrying about environmental inconsistencies or setup issues. If you encounter any challenges or have further questions, the Daytona team is readily available to assist you on Slack, or you can open an issue on the Daytona GitHub repository. Happy coding, and enjoy your development journey with Backstage!


